Creating Finance Charges
Purpose: This document will teach the DockMaster user how to configure the Accounts Receivable module to assess finance charges, update the customer file and process finance charges.
Step 1: Configure Finance Charges
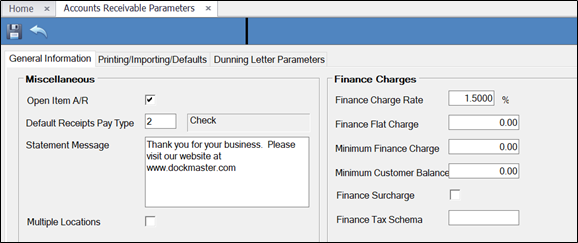
From the Menu, click System Administration > Configuration > Accounts Receivable
Fill in the section for the finance charges:
Step 2: Update Customer File
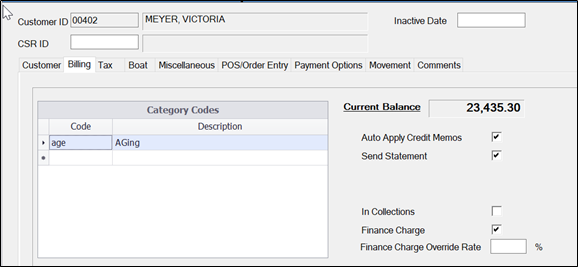
From the Menu, click File Maintenance > Customers
Click on the Billing tab for each customer that will have the finance charge assessed.
Check the Finance Charge box.
Step 3: Create Finance Charges
From the Menu, click Accounts Receivable > Charges > Create Finance Charges
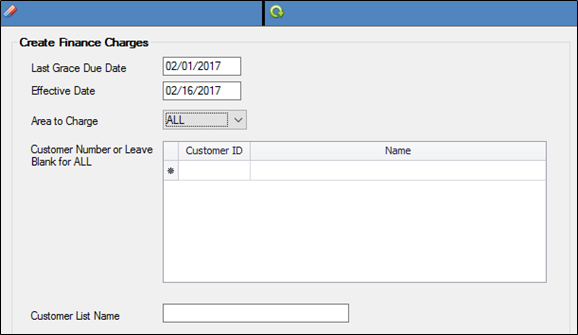
Last Grace Due Date - Enter the Last Grace Due Date for invoices; this is a REQUIRED field. All open invoices with a due date prior to this date are totaled. Any credits or payments made within 30 days after the grace date (inclusive of the grace date) are totaled. If the difference between these two figures is a positive amount, a finance charge will be calculated.
All open invoices with a DUE DATE later than the date entered are excluded from the finance charge calculation.
Effective Date - Enter the Effective Date for the finance charge invoices or press Enter to default to the current date. This is also the accounting date for the General Ledger transaction.
Area to Charge - Click the down arrow to select the specific Charge Area you would like to generate finance charges for or accept ALL areas as the default. The valid areas include:
Customer Number - Enter one or multiple Customer Numbers or leave the prompt blank to include ALL customers. Type a name preceded by a backslash "" to access a cross-reference list.
- We have a new way to search. You can now right click to list customers. You can also still press F6 to list customers
- Right click and choose List or Press F6 to list customers.
- Right click and choose delete row or Press F7 to delete a row.
Customer List Name - Enter a Customer List Name or bypass this prompt. This list should be created with the Report Generator. If you need help creating a list, please email [email protected] or check our website for the next Report Generator class.
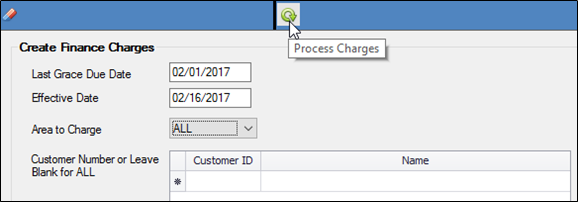
Click the Process Charges button to create the finance charge invoices.
Step 4: Completing the Finance Charge Process
The following steps should be performed after generating finance charge invoices:
1. Go to Accounts Receivable > Charges > Charges Edit List to print an edit listing to review and verify the amounts calculated on the finance charge invoices.
2. Once you review the report, continue to Step 3 if you need to make changes. If no changes are required, proceed to Step 5.

TIP: If you have made an error and need to delete the entire batch go to Accounts Receivable > Charges > Delete Non-Posted Finance Charges. Enter the Effective Date that you used when you processed the finance charges.
3. Go to Accounts Receivable > Charges > Miscellaneous Charges to modify or delete individual finance charge invoices.
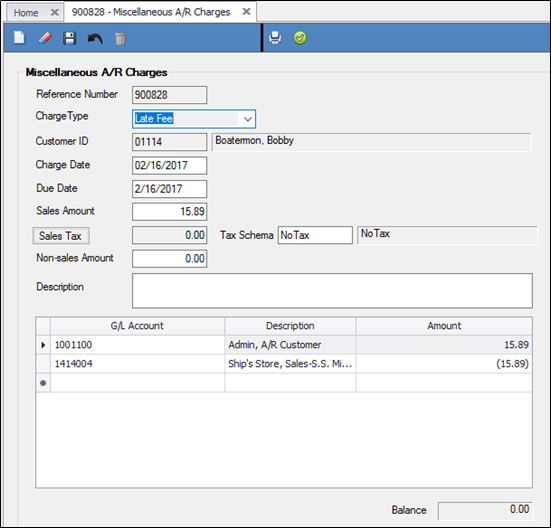
4. Reprint the Charges Edit Listing to review any changes or proceed to the next step if no changes were made.
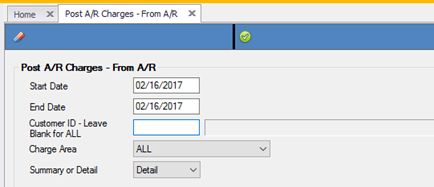
5. Go to Accounts Receivable > Charges > Post Charges to post the finance charge invoices to the individual customer accounts.
**If at any point you run into any issues, feel free to email [email protected] for assistance.**