E-Mail AR Statements
I. Purpose
The purpose of this tutorial is to teach you how to use the bulk e-mail feature for Accounts Receivable Statements. This feature allows you to e-mail statements to customers that have
an e-mail address in the Customer Maintenance file. You will be able to print statements for anyone that does not have an e-mail address on file.
II.Requirements
- You must fill out the DockMaster parameters to store the address of the outgoing mail server. For functionality of the e-mail system in DockMaster you are required to have a legitimate SMTP Server address. (i.e. mail.dockmaster.com). In some cases it could be the IP address depending on how your mail server is set up.
Note: Questions regarding your SMTP Server address should be answered by your IT Manager.
Outgoing Server, Port, User name and password: Are specific to your mail server
Use SSL (Secure Socket Layer): You will need to know if you require this
Default address: Can be specific, generic, bogus (i.e. [email protected] )
To send statements, fill in the A/R Statement Email Address
DockMaster > System Administration > Configuration > DockMaster Parameters >
Tab 3 System Information
E-Mail Settings

- You must also have the clerk’s e-mail address on the Clerk Maintenance file in order for that clerk to use any of the e-mail functions.
DockMaster > System Administration > Security > Clerk Maintenance
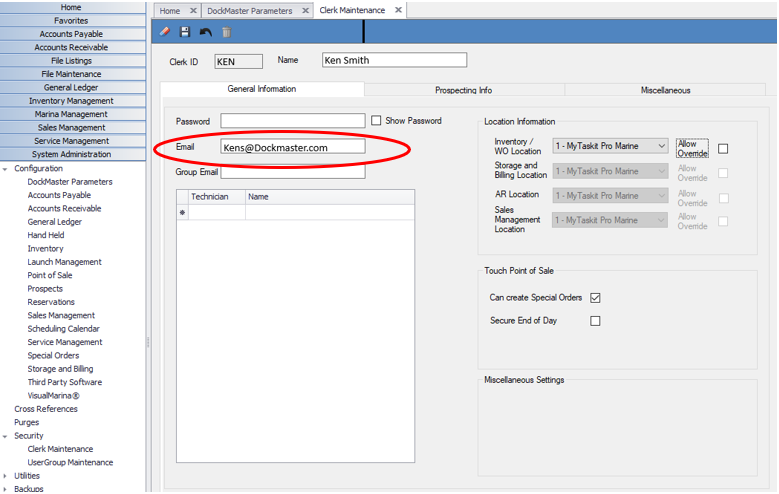
- You will need to designate the Statement Print Program in the AR Parameters and import the Logo. You can click the Import button to browse for and find the logo location.
- You must use the STATEMENT.LOGO print format.
DockMaster > System administration > Configuration > Accounts Receivables > Tab 2 Printing/Importing/Defaults

Notes:
- Standard logo/graphic format is 800 x 600 pixels and is best saved as .JPG
- The final requirement for e-mailing statements is a check box in the Customer Maintenance file on Tab 2 This check box is unchecked by default and must be checked to have the customer’s statement included when processing e-mail statements.
Note: DockMaster offers data services to check the box globally for all existing customers with an e-mail address. Please notify us if you are interested in having this done [email protected]
DockMaster > File Maintenance > Customer File >
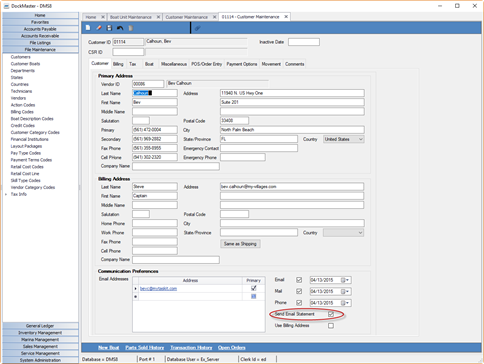
DockMaster > File Maintenance > Customer File >Tab2 (Billing)
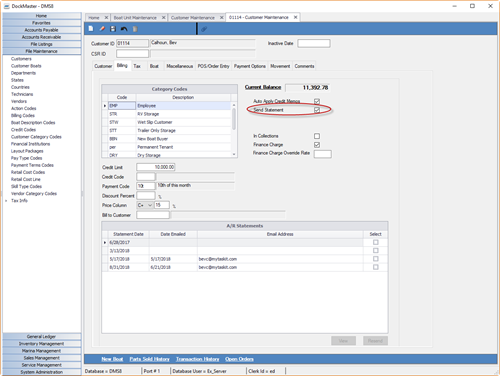
Please Note: The Send Statement check box must be checked as well as the Send E-mail Statement check box.
**III.**Processing AR Statements
- The functions of the Printing or Emailing statements is basically the same, choose your normal selection and select the E-Mail
You have the ability to print statements for customers with no e-mail address after the e-mail statements have been sent. The system creates a list of those customers that did not receive an e-mail statement and you may print those statements now or later.
DockMaster > Accounts Receivable > Invoice/Statement > Print AR Statements
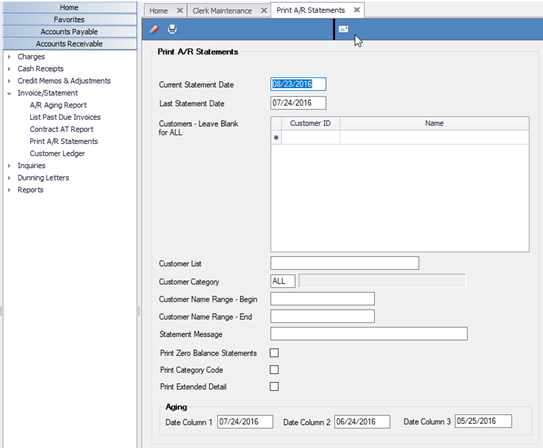
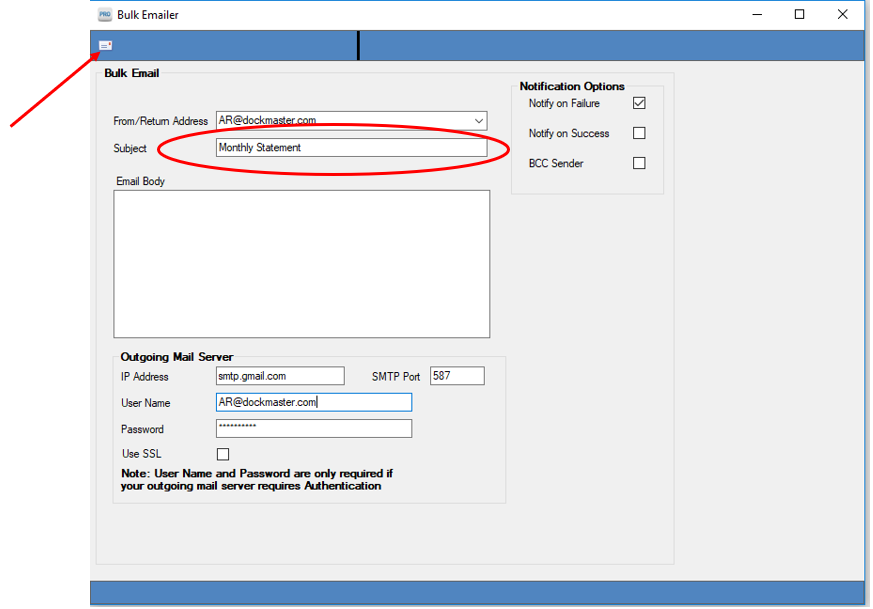
- The Print Controller window will appear.
A.The From/Return Address field defaults to the AR Statement e-mail address that was defined in your DockMaster parameters as does the Outgoing Mail Server. They may also be
changed or maintained from this window.
B. It is required that you put something in the Subject field. If this field is left blank you will receive a message that it is required and the e-mail statements will not be sent until you
populate the field.
C. You need not put in a user name and password unless your e-mail server requires authentication.
D. Click the Send button to send the e-mails
E. You will see the “Generating Statements” window appear. This may take several minutes depending on how many customers you have.
The system is generating a PDF document. In other words, the statements are sent as an attachment.
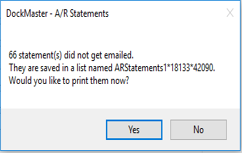
After the e-mail statements have been generated you will receive a message as shown below to print statements for customers with no e-mail address on file.
F. Click Yes to print statements now or No to print them later.
Make note of the list name if you choose to print later.
In this case the list name is : ARStatements1*8133*42090
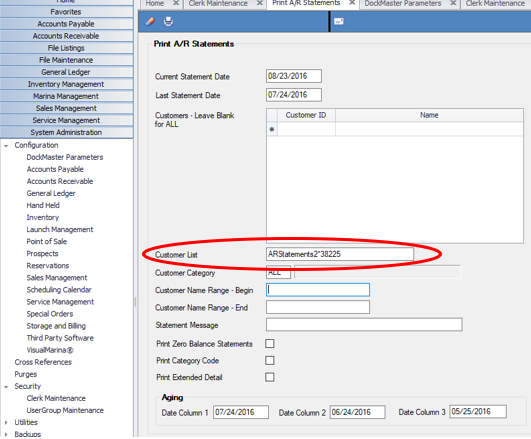
G. If you choose to print them later you will print them by list. You may press F6 at the Customer List field or simply type in the name of the list and click the print button.
**If at any point you run into any issues, feel free to email [email protected] for assistance.**