How to Board Your Verifone P400 Terminal
What’s in the box
- P400Plus Terminal Device
- P400 1,0M Dongle Ethernet/RS232/USB
- P400/v400c Privacy Shield
- Power Supply US – P400/vX820
Please Note: ethernet cables are not provided with your terminal
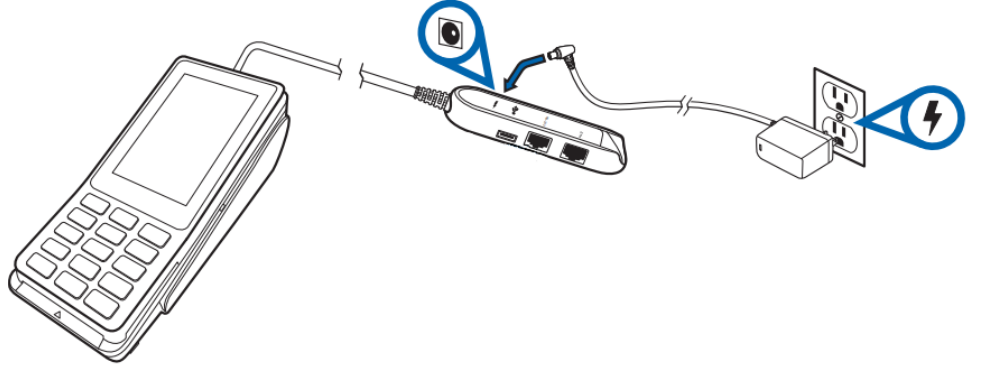
Connect the cables from the box together
- Connect the Dongle Ethernet/RS232/USD cable to the P400 Terminal Device
- Connect the Power Supply to the Dongle
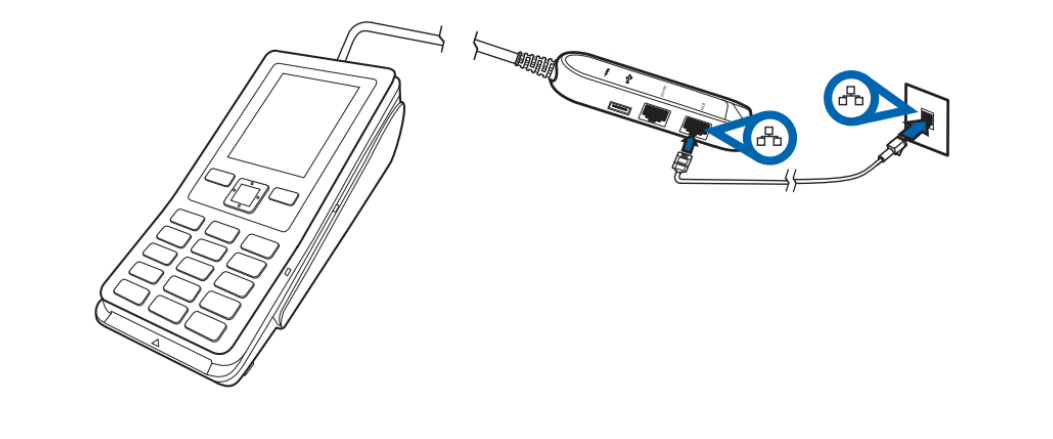
If connecting to Ethernet (recommended)
- Connect an Ethernet cable to the Ethernet (LAN) port on the Dongle. This port is marked with ETH or this symbol:
- Connect the other end of the Ethernet cable to your wall Ethernet Port.
IMPORTANT: Connecting the wrong type of cable to the Ethernet port or connecting the Ethernet cable to the wrong port may severely damage the terminal.
If connecting to Wi-Fi
- On the terminal press 9,#, then the green ENTER key to access the device settings.
- Passcode 0856
- On the terminal display, select Configure Network
- Select Wi-Fi.
- Turn on the Wi-Fi toggle switch.
- Select the + icon to add a network. The terminal will now scan for Wi-Fi Networks.
- To select your Wi-Fi Network, you can either
- Choose the desired network from the list OR
- Select Add Manually and enter the name (SSID) of the Wi-Fi network.
Board the terminal
- Select Board the terminal.
- Select your store.
- Select Confirm.
Boarding can take up to 30 minutes. The device will restart multiple times through this process.
Once it’s done, the terminal will stay idle on the Adyen screen.
The boarding process is now complete.
Switching your Wi-Fi network after the terminal is boarded
- Go to the Admin menu.
- Select 9 and then the Confirm key.
- Enter the Admin menu passcode: 0856.
- Select the Confirm key.
- Select Network, then Wi-Fi.
You can now:
- Turn Wi-Fi on or off using the Wi-Fi toggle switch.
- Change IP settings.
- Add another network using the instructions under “If connecting to Wi-Fi”.
**If at any point you run into any issues, feel free to email [email protected] for assistance.**