Storing and Charging a Stored Payment Option (CC or ACH) through DockMaster
-------------------------------------
Storing the Credit Card or ACH through DockMaster to your CC Processing system
Customer File Maintenance
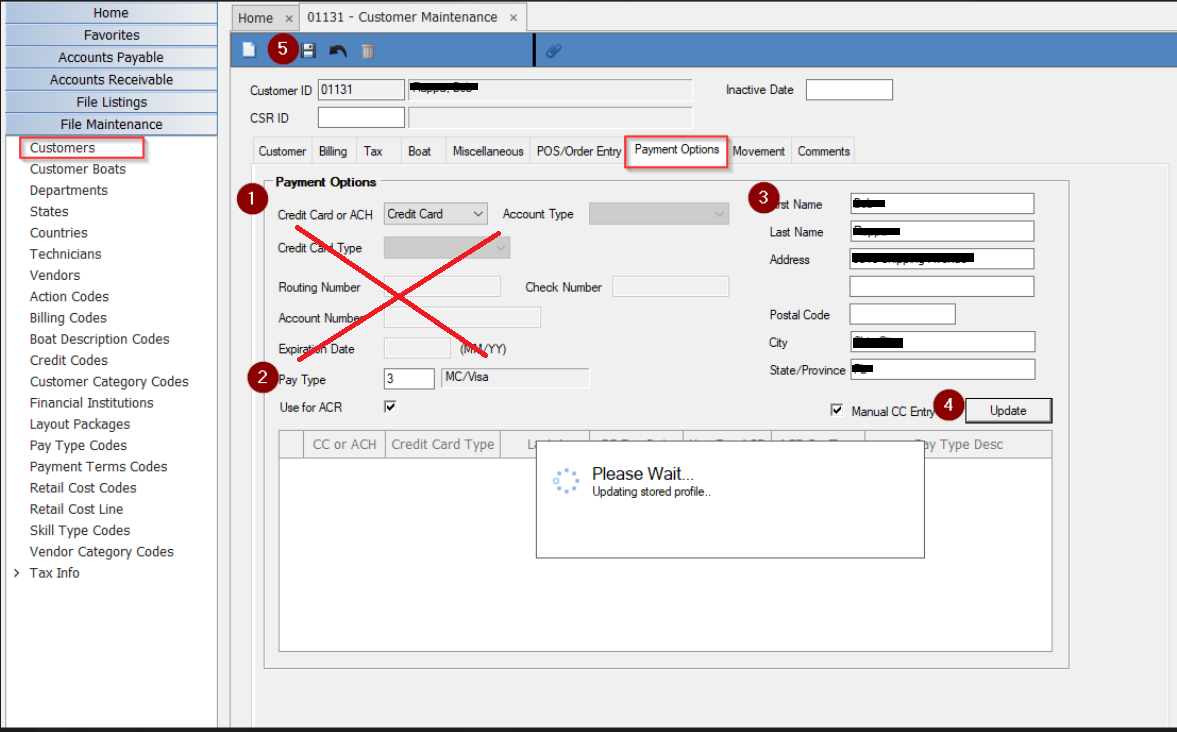
In Customer File Maintenance on the Payment Options tab please complete the following to store a card through your DockMaster CC integration.
- Select Credit Card or ACH from the drop-down menu. Hit Tab on the keyboard to bring you to the next step.
- Skip down to Pay Type and put in the appropriate pay type for that card. Hit Tab on the keyboard to bring you to the next step.
- To fill in these Name and Address Fields, simply hit TAB through each field which will automatically fill in that data.
- Check Manual CC Entry if needed, and hit UPDATE which will then fire up the CC reader. Follow prompts on it.
- Make sure to choose CREDIT. Cannot store a card as DEBIT as DEBIT requires a PIN on each use.
- Hit the SAVE button on the top to save. (Do not hit UPDATE a second time as that will fire up reader again)
Manual CC Entry Checked
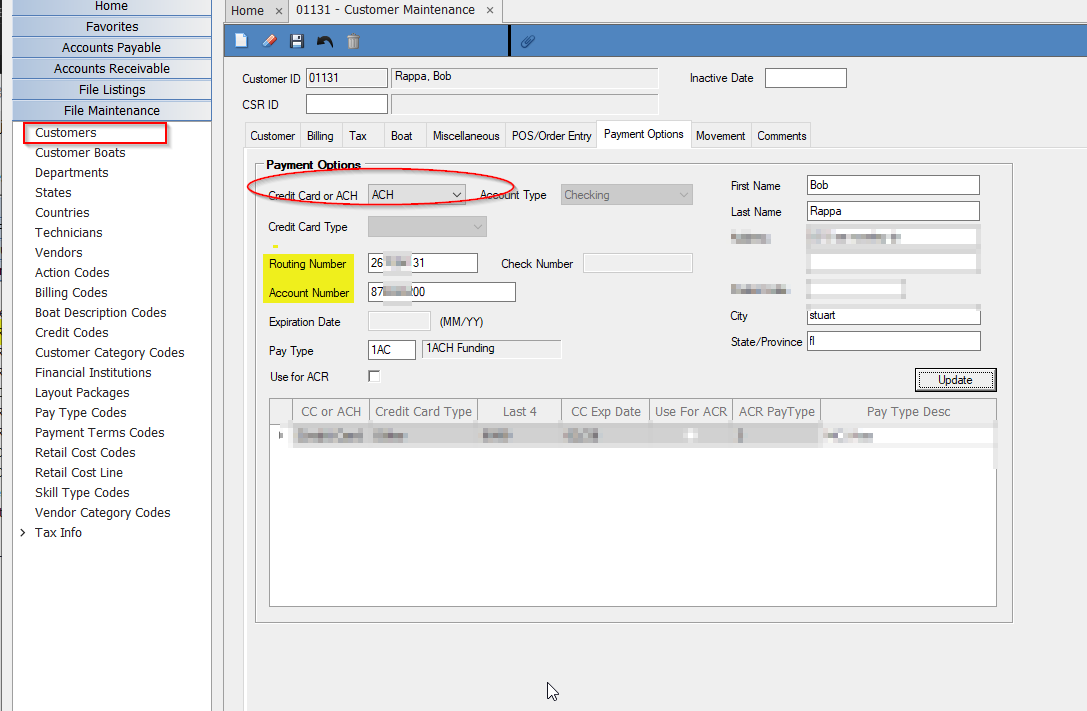
For storing ACH's the process is similar. Fill in the Routing and Account Number on the POS screen versus entering it into the CC reader, and then hit UPDATE to submit:
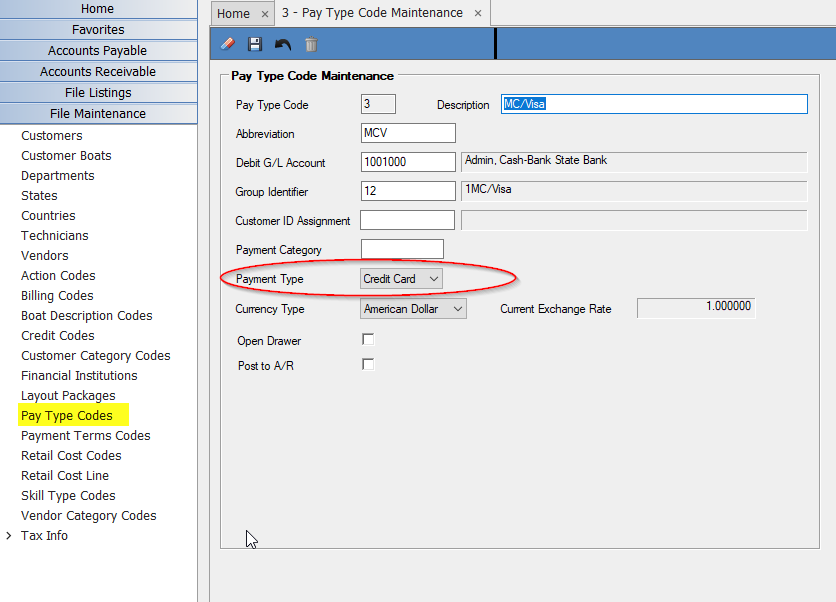
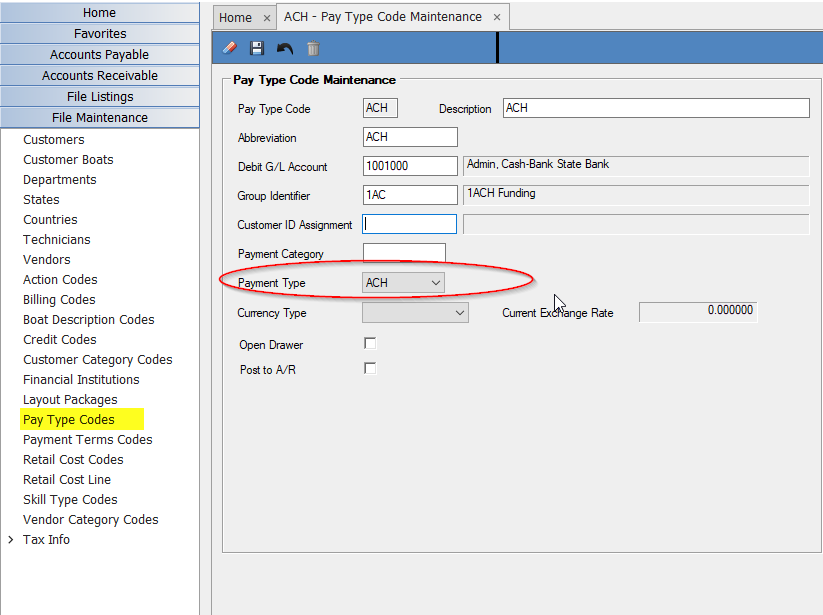
Pay Type Setup
The Pay Type must have it's Payment Type set as Credit Card or ACH for the system to know that that is the type of pay type it is you are using. This is necessary on the pay types used in Cash Receipts Entry, and the pay types saved to the Customer File on the Stored Payment Option. Examples of CC and ACH below:
2.) Charging the Stored Payment Option through DockMaster to your CC Processing system
Cash Receipts Entry
Starting from the batch id on the cash receipts form perform the following steps.
- Enter the Clerk ID, Deposit Date, and G/L Eff Date.
- In the Customer Id field select a customer that has a stored profile.
- Enter a reference number.
- In the Pay Type field ignore the default pay type and complete the following;
- Press F7 or right click and select Stored Payment Options.
- When the grid appears select any one of the stored profiles listed
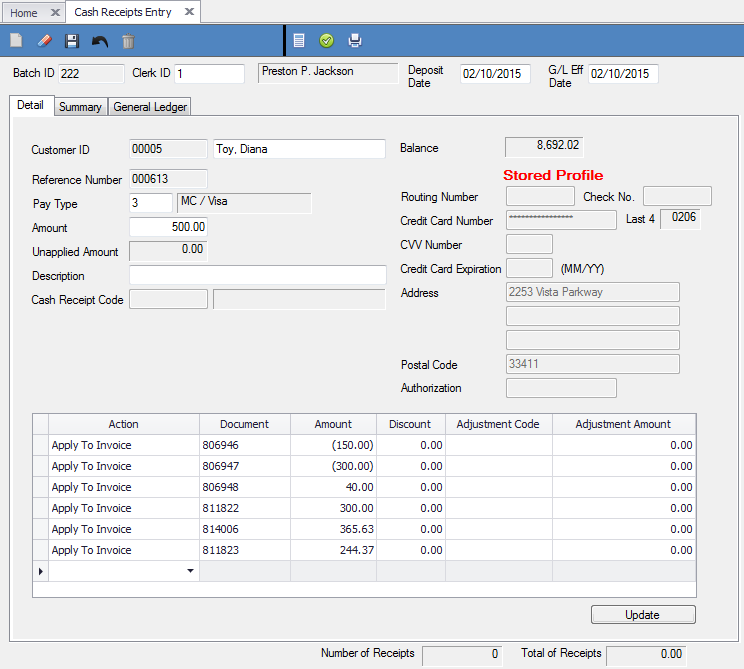
- The cash receipts form will update and the credit card fields will gray out with Stored Profile in red above the fields. See image below.
- Process the receipt as normal.
Note to clear the stored profile once it has been selected, return to the pay type field and press F8 or right click and select Clear Stored Payment Options.
Sample image showing Stored Profile selected.
3.) Charging the stored payment option using a Pay Type button in POS.
Pay Types
The Pay Types tab contains the pay type settings for the register being defined. It is important that each register be defined with pay type buttons that are applicable to the location that the register resides in. Screenshot below shows how the Stored Payment option button setup should look:
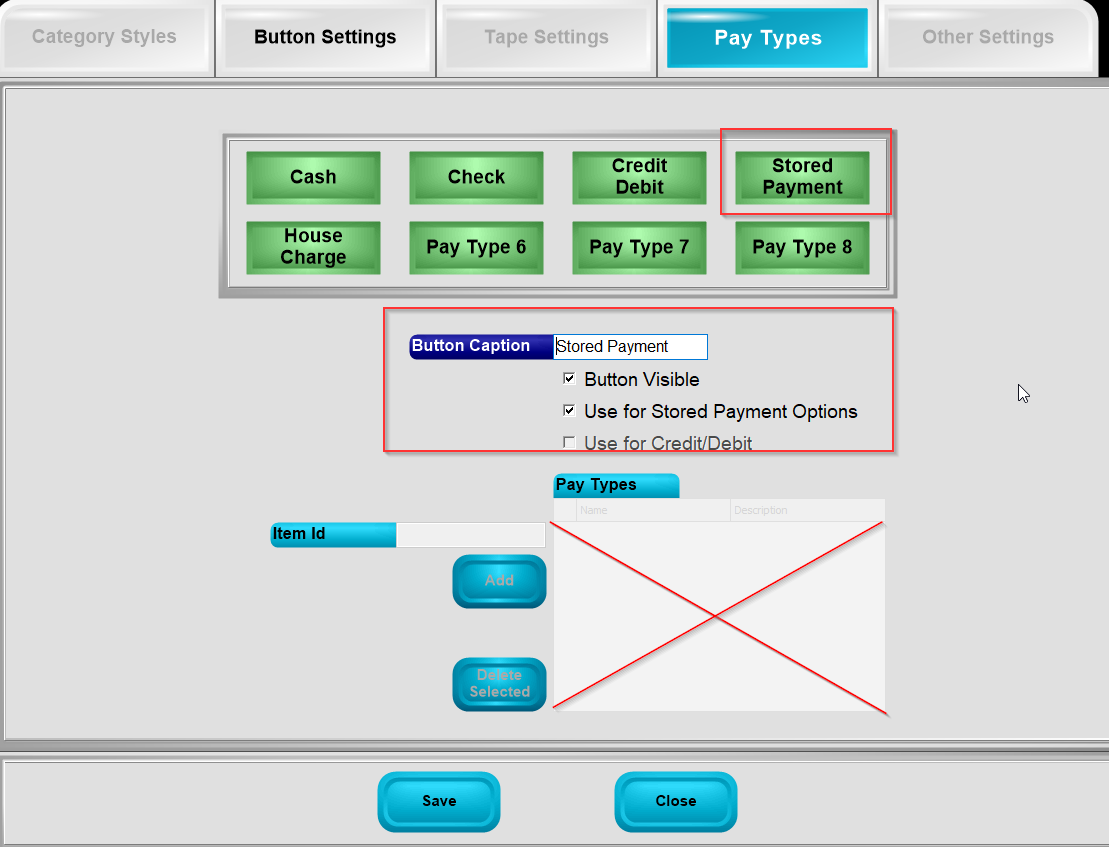
Button Caption - This field contains the caption for a selected button.
Button Visible - This checkbox when checked allows the button to be visible as a pay type selection.
Use for Stored Payment Options - This checkbox when checked will configure the button automatically to use the customer's stored profile for CC Processing.
Item Id - This field is used to add the pay type id number for the selected button above when configuring the button. Note that multiple pay type id's can be defined for each button as needed.
Defining a Button
- From the Main screen in TPOS tap the Functions button.
- Tap the Register tab that appears on the right of the Functions screen.
- Tap the Register Setup button.
- The system Register Setup menu will appear.
- Tap the Pay Types tab.
- Select a button to define by tapping on it. Note that the focus does not change on the button, but the button text and item grid will change to represent that button's current settings.
- In the Button Caption field enter a name for the button.
- If the button will be used for processing transactions to the customer's stored profile in your CC processing system, click the checkbox “Use for Stored Payment Options”. If the box is checked then no pay types can be entered into the pay type grid below it as the pay type defined on the customer's stored profile will be used
Please take a look and let us know if questions or assistance is needed.
Thanks,