DockMaster Home Detailed Overview Widgets
Home Tab Overview
The purpose of this tutorial is to guide you through setting up the Home Tab with workflow widgets, personalized messages, and messages from the Message Center. You will also learn how to name your widgets and workflow groups, export / import widgets and the meaning of “system” messages sent from the DockMaster Support Team.
Work Flow Widgets
Work Flow Widgets can be used to help standardize processes. Workflow Widgets can be created by individual clerks, but they can also be exported / imported to other users.
Workflow Widgets make it extremely easy to complete a process without having to go to the menu to find the next step. As you complete the first step of the process and close the form the next step will automatically open for you.
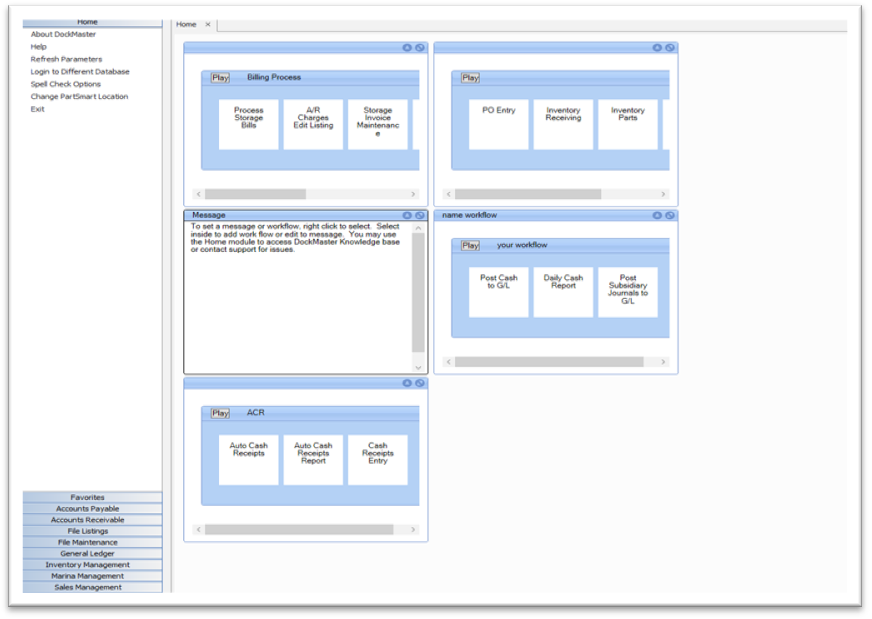
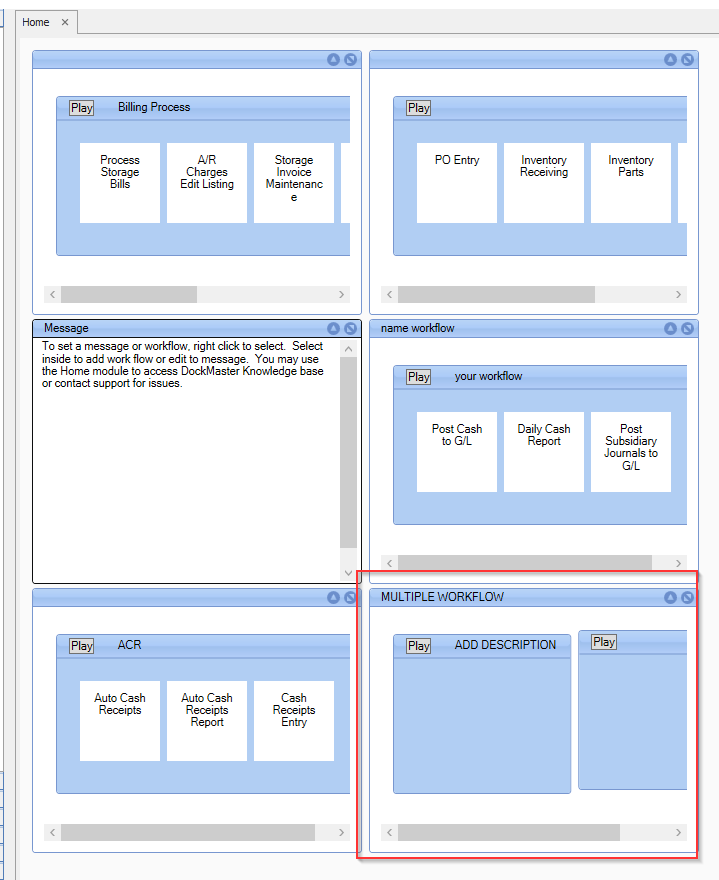
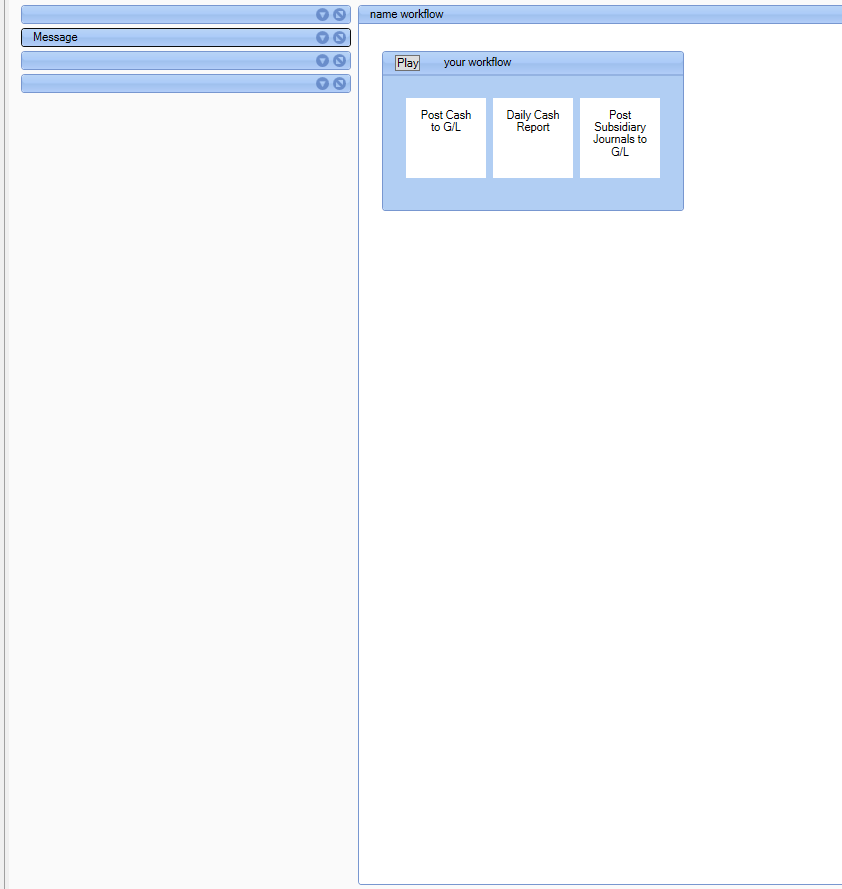
Workflow Widgets can have a single Workflow Group or multiple Workflow Groups. You can also expand / collapse widgets and messages. See examples below.
Single Workflow Widget with multiple Workflow Groups
Multiple Workflow Widgets with single Workflow Groups in each widget.
Collapsed widgets and expanded message
Now that you have seen examples of some of the features let us learn how to create the Workflow Widget.
- Right click on the Home tab in a blank area and choose Add Work Flow Widget
- Right click inside the Widget and choose Add Work Flow Group.
- From the menu drag and drop the menu items that make up the work flow in the Work Flow Group
- To name your widget right click on the blue bar at the top of your widget and choose Change Title. Type in the name of your widget.
- If you want to name the Work Flow Group right click in the blue bar of the group and choose Change Description.
- You may add additional Work Flow Groups to a single widget or add multiple widgets.
- Once you have all your widgets set up right click in the blank area of the Home tab and Save. If you miss this step your widgets will not be there after logging out and logging back in.
- If you want to export the widget to share with someone else right, click and choose Export. Give the file a name. You can email, save it in a common file that other users can access or put it on a thumb drive to share.
- To import widgets right click in the blank area of the Home tab and choose Import. Browse out to find the file. Remember to save after importing.
- To remove a Work Flow Widget right click on the widget and choose Remove.
- To remove a Work Flow Group right click on the group and choose Remove.
Personal Messages
Personalized messages are like a sticky note. These messages are easy to create and can be removed or edited at any time. Multiple messages are allowed. Follow the steps below to create a message.
- Right click in the blank area of the Home tab and choose Add Message Widget.
- Right click in the Message Widget and choose Edit to personalize the message. You can use the same Message Widget over and over if you want by simply editing the text in the message.
- To remove the Message Widget right click and choose Remove.
- Right click in the blank area of the Home tab and Save after you add, edit, or remove the Message Widget. If you miss this step your changes will not be there after logging out and logging back in.
Message Center Messages
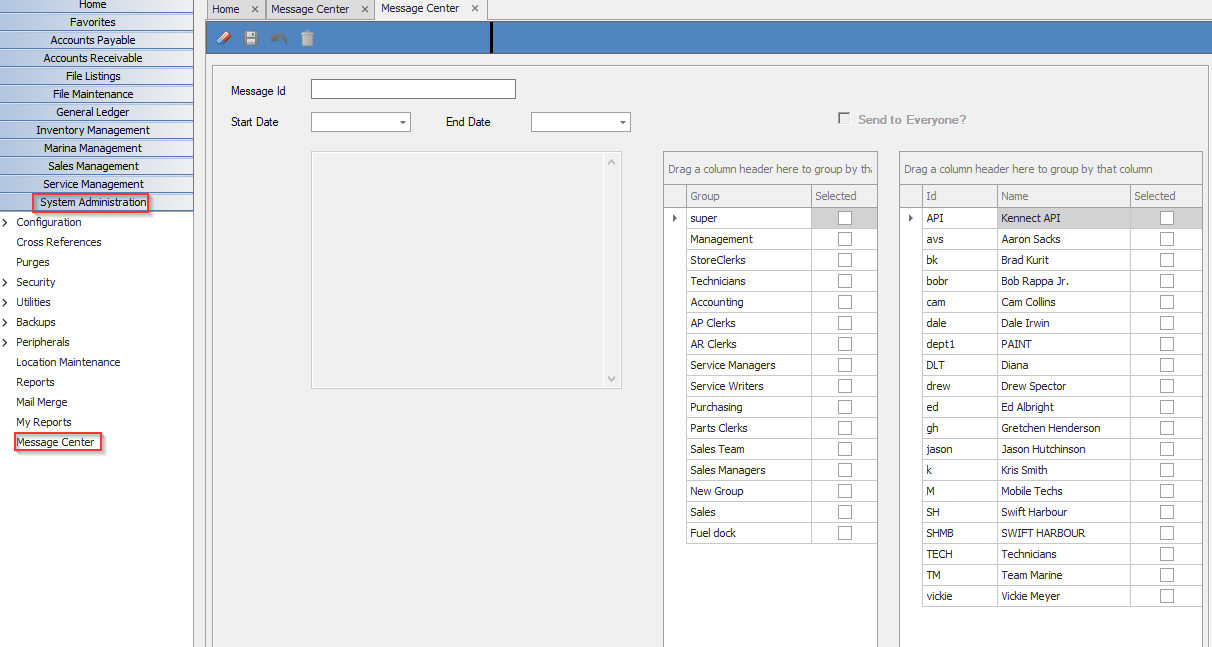
The Message Center function is found under the System Administration tab. This function allows you to create a message that can be sent to a work group, an individual clerk or to anyone. These messages do not appear in real time like an instant message. Messages created here will not be seen by recipients until they have logged off and logged back in. Follow the steps below to create a message from the Message Center.
- Open Message Center from the System Administration menu
- Give your message an ID.
- Give your message a start and end date.
- Enter your message.
- On the right side of the screen select the recipients.
- Save the message.
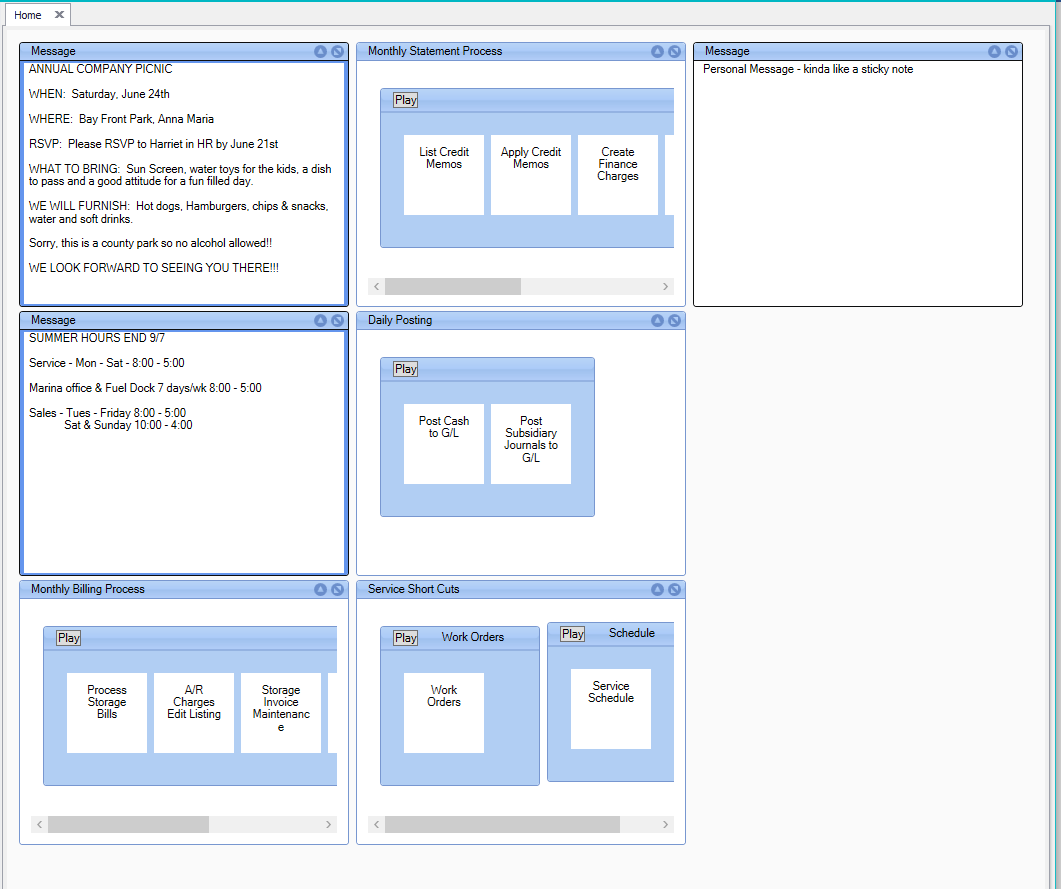
- Messages appear in the top left corner of the recipient’s Home tab and have a thick blue boarder to identify them as a message from the Message Center.
- If there are multiple messages they will be found on the left side of the Home tab.
- Remember to log out and back in to view the message.
- Messages are saved after they expire and can be accessed by right clicking at the Message ID field and selecting the message.
- Expired messages can be used again by changing the start and end dates.
- You may have multiple active messages at any given time.
- You may delete messages by right clicking, selecting the message, and then pressing the delete icon.
Example of a Message Center message set up
Example of Home Tab with multiple messages from the Message Center
System Messages from DockMaster
From time to time you will see a message on your Home tab that comes from the DockMaster Support Team. These messages have a thick border and are color coded to help you identify the type of message. These messages will appear in the top left corner of the Home tab.
- Red border is a warning message from Support to be aware of issues that are likely to impact operations.
- Yellow border is an alert message from Support to be aware of impact to operations.
- Green border is a general message from Support to make you aware of things like maintenance events or available updates.
**If at any point you run into any issues, feel free to email [email protected] for assistance.**