How do I upload photos and documents to DockMaster?
Purpose: This document will instruct the DockMaster user how to attach documents and photos to customers, boats, work orders, accounts payable invoices and many other records
Photos and documents can be attached to most records in DockMaster through the Maintenance screen.
Step 1: Save document or photo to a shared location
Any photo/document to be attached to a customer boat, work order, customer, AP invoice, etc. must be stored in a shared location where any user has security to open it. For example, in a Shared Folder, or Shared Drive on any PC or Server - \shared\DockMaster\Attachments.
IF A PHOTO OR DOCUMENT ATTACHED TO A DOCKMASTER RECORD IS SAVED IN A PERSONAL UNSHARED FOLDER, THE ATTACHED DOCUMENT WILL NOT BE VIEW-ABLE BY OTHERS.
Step 2: Attach the document or photo to a DockMaster record
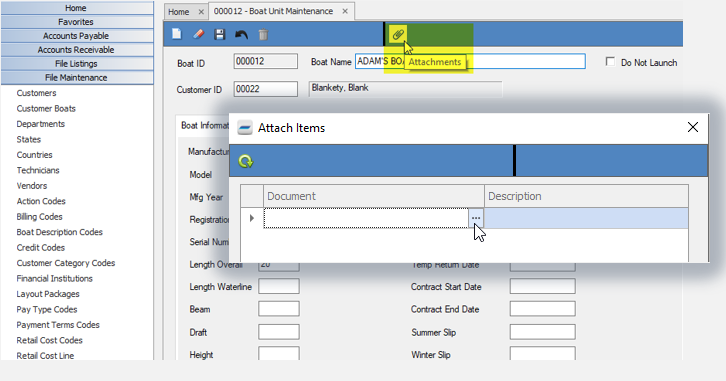
- After the document or photo is saved to the shared location, open the record the document will be attached to.
- Click on the paper clip icon.
- Click into the Document field, then click on the ellipses " . . . "
- Windows Explorer will open. Browse to the location to select the specified document
5. Click on the round green arrow icon to save.

6. When the Attach Items grid closes, save the record that the document is now attached.
Click into the Document field, then click on the ellipses " . . . " Windows Explorer will open. Browse to the location to select the specified document:
Step 3: View a document or photo Attached to a DockMaster record
Documents attached to records will be visible to any user who has permission to view that type of record. Any user who opens a record with an attachment will be able to click on the paperclip icon and open any documents that are stored for this record
To open the attachment(s), click inside the document name and press F6.
