Creating and Changing Clerk Records
Purpose: To provide instruction to the DockMaster administrator on how to create a clerk record. A clerk record is necessary for each employee who will work in the DockMaster software.
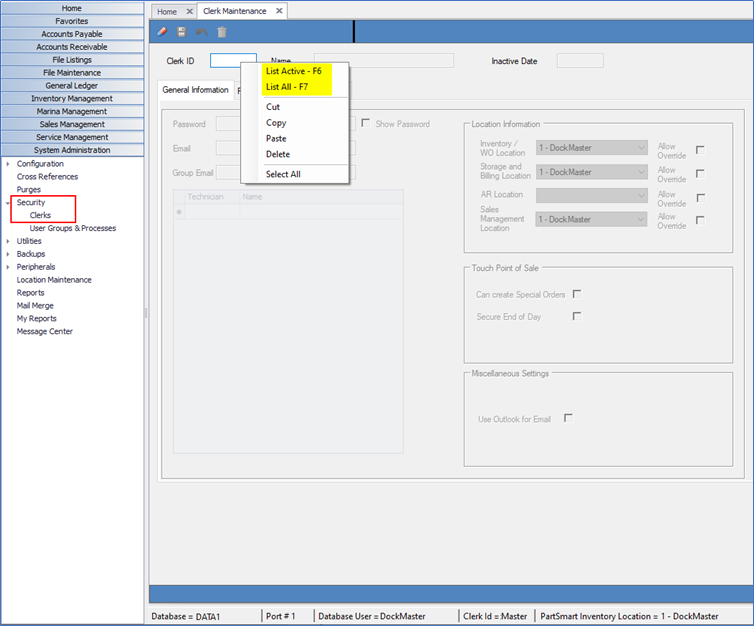
On the Menu, click System Administration > Security > Clerks
Press F7 to view all clerk records that are already defined, even those with an Inactive Date. To view only Active clerk records, press F6. Although the Inactive Date field is available, it is for tracking purposes only; it does not prevent or stop a clerk from logging in. To prevent inactive clerks from accessing DockMaster, it is recommended that the password be changed on the clerk instead of deleting the clerk id after transactions have been processed.
Step 1: General Information tab
The General Information tab contains the clerk's location overrides, assigned techs and Point of Sale and email settings.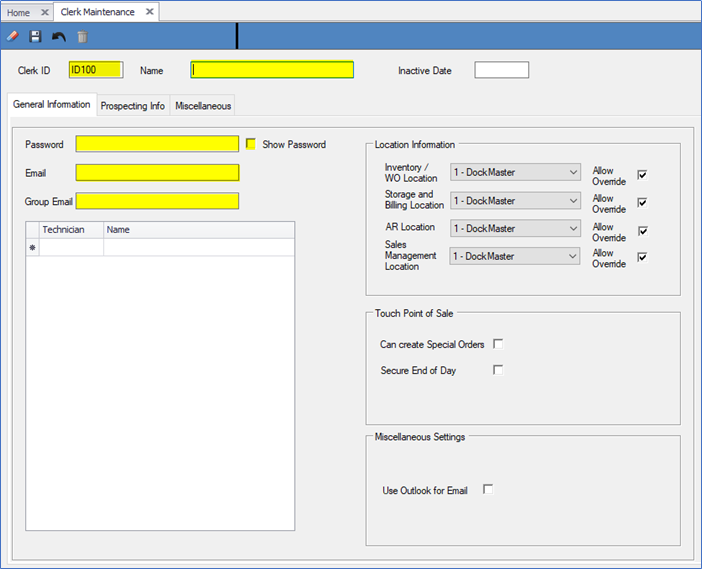
- Clerk ID – Enter up to an 8-character code, alpha and/or numeric
- Name – Enter the clerk’s name, up to 30 characters in length
- Password – Passwords are not required; however, it is recommended that each clerk have their own password. To view the characters in the password, click the Show Password
- Email – Enter the email address for the clerk. This address will serve as the default when this clerk sends an email. Note: If your email provider does not allow relaying, only the primary email address in DockMaster Parameters is used for sending email.
- Group Email - Enter the email address for the clerk. This address will serve as the default when this clerk sends an email. Note: If your email provider does not allow relaying, only the primary email address in DockMaster Parameters is used for sending email.
Location Information –
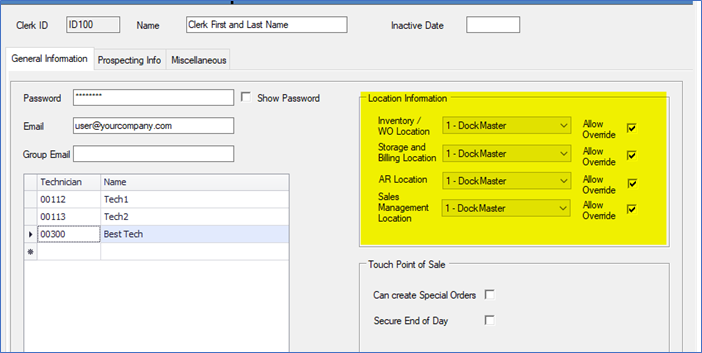
- Inventory/WO Location – Enter a default Inventory Location for this clerk. This prompt is used by the Point of Sale, Inventory Management and WO Processing modules. If the Allow Override box is checked, the Location Code Listing window will be displayed each time this clerk enters any area of the module that requires a location to be selected.
- Storage and Billing Location – Enter a default Location for the Storage and Billing and VisualMarina modules; click the down arrow to see additional choices. This prompt is used throughout the Storage and Billing and VisualMarina modules to default the Location when applicable. If the Allow Override box is checked, the Location Code Listing window will be displayed each time this clerk enters any area of the module that requires a location to be selected.
- AR Location – Enter a default Accounts Receivable (AR) Location for this clerk. If the Allow Override box is checked, the Location Code Listing window will be displayed each time this clerk enters any area of the module that requires a location to be selected.
- Sales Management Location – Enter a default Location for the Sales Management module. This prompt is used throughout the Sales Management module to default the Location when applicable. If the Allow Override box is checked, the Location Code Listing window will be displayed each time this clerk enters any area of the module that requires a location to be selected.
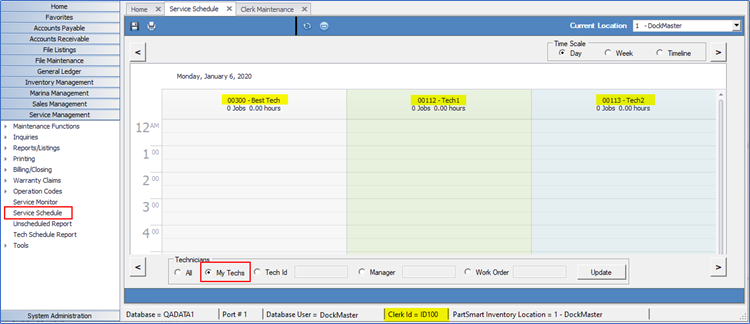
Technician – This grid is used to list the Technician IDs that the clerk manages. When used in conjunction with the Service Schedule, the technicians listed here will display when the option to view only the clerk’s techs is checked.
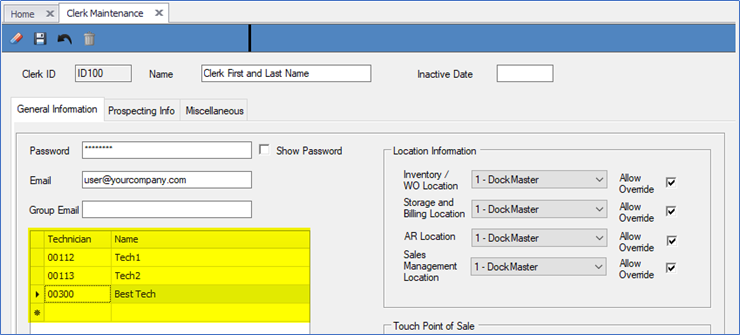
Service Schedule with clerk ID100 logged in and ‘My Techs’ checked - Displaying the Technician IDs defined in the grid in the Clerk record:
Touch Point of Sale –
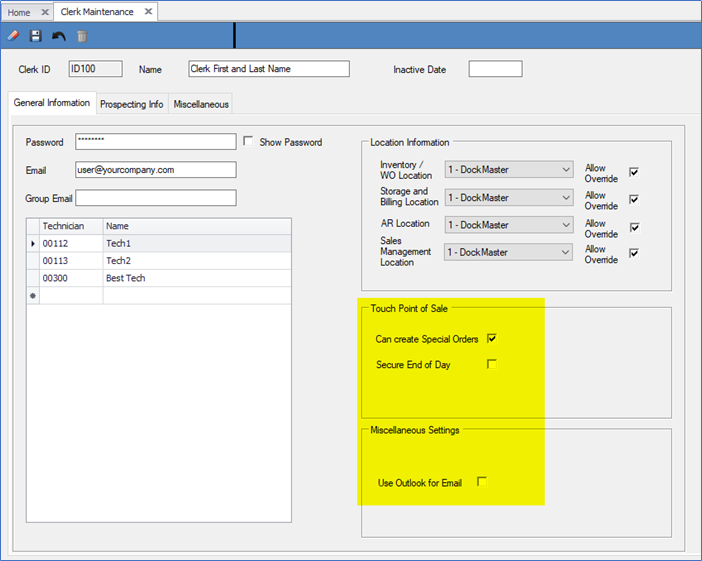
- Can create Special Orders – When this box is checked, the clerk will have the ability to create special orders in Point of Sale.
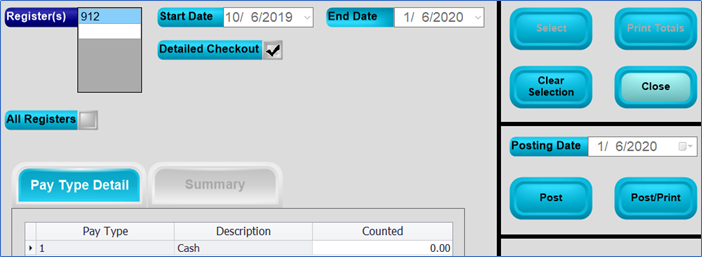
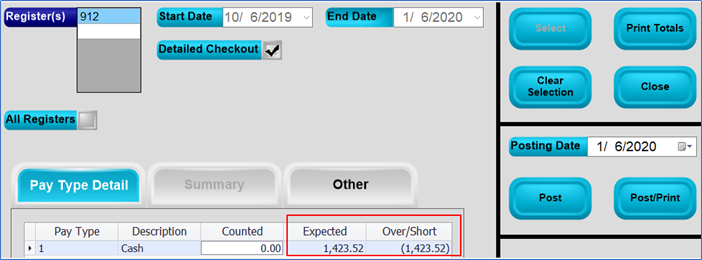
- Secure End of Day – If this box is checked, when performing the End of Day process, the clerk will be unable to see the Expected totals column of the Pay Type Detail tab.
End of Day, Pay Type Detail Tab in POS – With Secure End of Day box checked in the clerk record:
End of Day, Pay Type Detail Tab in POS – With Secure End of Day box NOT checked in the clerk record:
Miscellaneous Settings –
- Use Outlook for Email – When this box is checked, Microsoft Outlook will open when the clerk attempts to email a document from DockMaster.
Step 2: Prospecting Info tab
The Prospecting Info tab allows you to define security levels for each clerk that has access to prospect functions in Sales Management. By defining security levels for each clerk, administrators have additional options to control prospecting functions.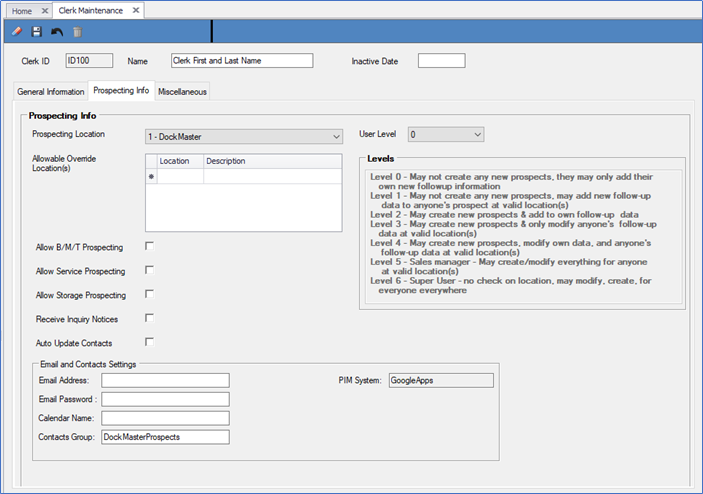
- Prospecting Location – Select a default location to the clerk to work out of. This option is not available if Sales Management is not set as multiple locations.
- Allowable Override Location(s) – If the clerk can work out of multiple locations for prospecting, add the additional locations here. This option is not available if Sales Management is not set as multiple locations.
- Allow B/M/T Prospecting – When this box is checked, the clerk can access the Follow Up tab in Prospect maintenance for Sales Management actions.
- Allow Service Prospecting – Check this box to allow the clerk access to the Follow Up tab in Prospect maintenance for WO Processing actions.
- Allow Storage Prospecting – When this box is checked, the clerk can access the Follow Up tab in prospect maintenance for Marina Management actions.
- Receive Inquiry Notices – When this box is checked, and another clerk accesses a prospect that is assigned to this clerk, an email notification will be sent stating which clerk inquired on the prospect.
- Auto Update Contacts – When this box is checked and the clerk’s Email and Contacts Settings has been defined, changes made to the prospect’s contact information will be updated in the clerk’s Google Apps or Outlook contacts group.
- Email and Contacts Settings – This group of controls contains the clerk’s login, password, calendar name, contacts group, and PIM system when Google Apps or MS Outlook. Note at the current time Google Apps is the only supported calendar and contacts PIM that is supported.
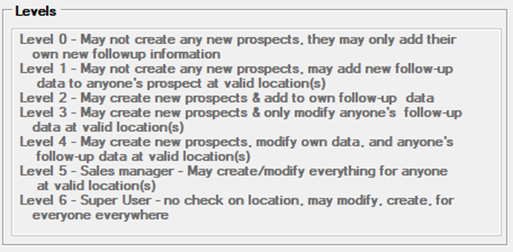
- User Level – This drop down contains the clerk’s assigned user level access. Note: Setting this level does not affect user group access settings for the clerk. Choose a level based on the following descriptions:
Step 3: Miscellaneous tab
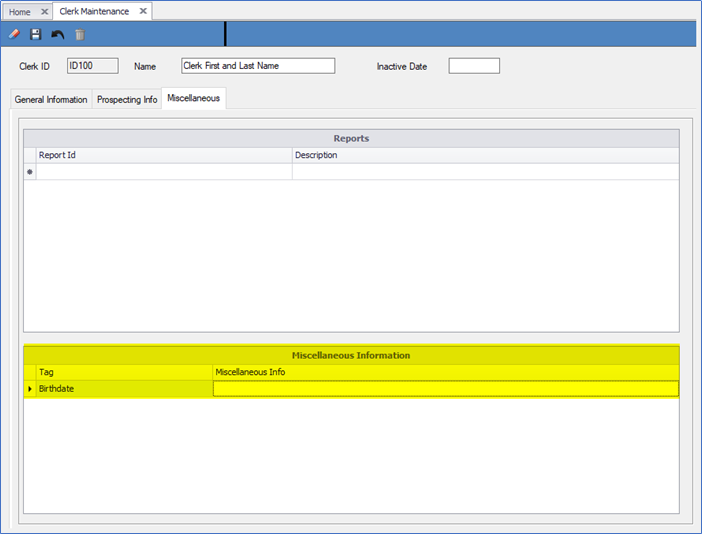
The Miscellaneous tab is comprised of two (2) sections – Reports and Miscellaneous Information.
The reports section is not being used at this time. The Miscellaneous Information grid can be used to define custom prompts (custom fields) such as birthdates, etc. This tab is not required to complete the set up of a clerk record.
When done, click the Save icon. The new clerk record is now complete and ready to be used. Any of the fields can be changed at any time by going to System Administration > Security > Clerks and pressing F6 or F7 to select a clerk and making the appropriate changes.
PLEASE SEE THE USER GROUPS AND PROCESSES DOCUMENT FOR THE NEXT STEP IN GRANTING RIGHTS TO THE CLERK RECORD.
IMPORTANT: To prevent inactive clerks from accessing DockMaster, it is recommended that the password be changed on the clerk instead of deleting the clerk id after transactions have been processed.
To create custom prompts, go to System Administration > Utilities > Custom Prompts > Click on the arrow and select Clerk/Security Maintenance.
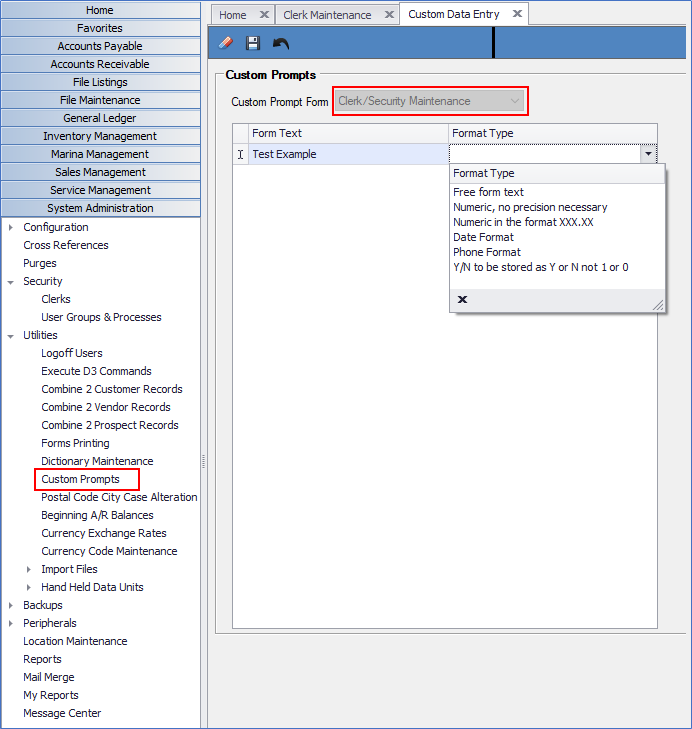
Form Text – Enter the description (title or label) to display in the grid.
Format Type – Click on the pull-down arrow and select the format that best suits the data for the new field.
Click the Save icon.