User Groups and Processes
Purpose: To provide instruction to the DockMaster administrator on how to create and manage user groups in order to impose security to the various modules within the software
On the Menu, click System Administration > Security > User Groups & Processes
The software is delivered with the super user group defined. This group should only be assigned to the System Administrator and other top level managers that are allowed access all areas of the application. A sample list of user groups has been provided below. Yours may differ based your specific needs. It is suggested that your organization’s structure be followed when defining user groups. Also note that multiple user groups can be assigned to restricted items for access.
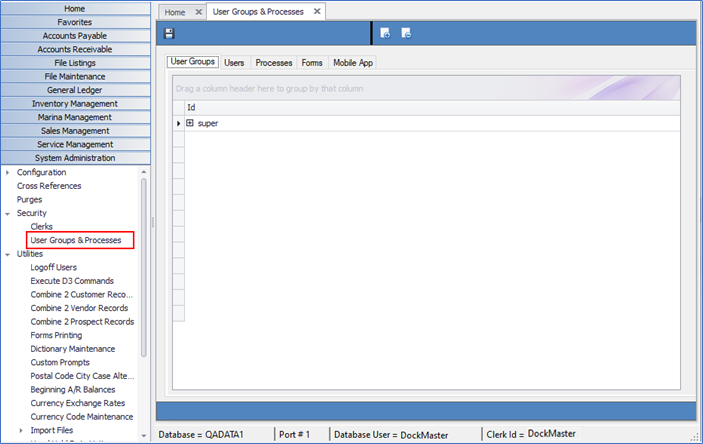
There are five tabs for the User Group & Processes menu item. They are:
-
User Groups - This tab is for managing the groups.
-
Users - This tab is for managing the clerk's assigned groups.
-
Processes - This tab is for managing security for processes.
-
Forms - This tab is for managing security access to menus, and forms.
-
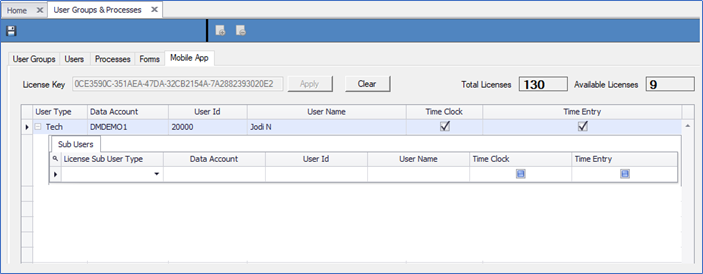
Mobile App – This tab is to assign mobile app licenses to technicians.
User groups should be defined for each level of security desired. They may be defined by department, organization structure, etc. A clerk can belong to one or more user groups based on position or responsibilities. When a user group is assigned to the clerk, access is being granted for all areas of the system that have been restricted to that group and no password will be required for those areas. If a clerk is not a member of a group that has been granted access to an area and an attempt is made to access it, a password prompt will appear requesting override access from a super user or someone with the proper access group rights.
Sample User Groups
| Super | This group has access to all areas of the application. |
| Administration | This group would consist of Controllers, Management Team, Owners |
| Accounting | This group would consist of AP, and AR clerks, Bookkeepers, |
| Sales Mgrs | Sales department Managers, F&I Managers |
| Sales Team | Sales persons, Title clerks |
| Service Mgrs | Service department Mgrs., Service writers |
| Service Team | Service Techs |
| Parts Mgrs | Parts department managers |
| Parts Team | Store staff, Parts counter, Warehouse, Shipping and Receiving staff |
Each tab and its functions are explained below. To access security processes, you must be a super user or have the appropriate access.
Setup security in the order that the tabs are listed below. It is assumed that clerks have been properly defined already.
Step 1: User Groups tab
The User Groups tab allows you to add and remove user groups, as well as view which clerks are assigned to a particular group.
To Add a Group
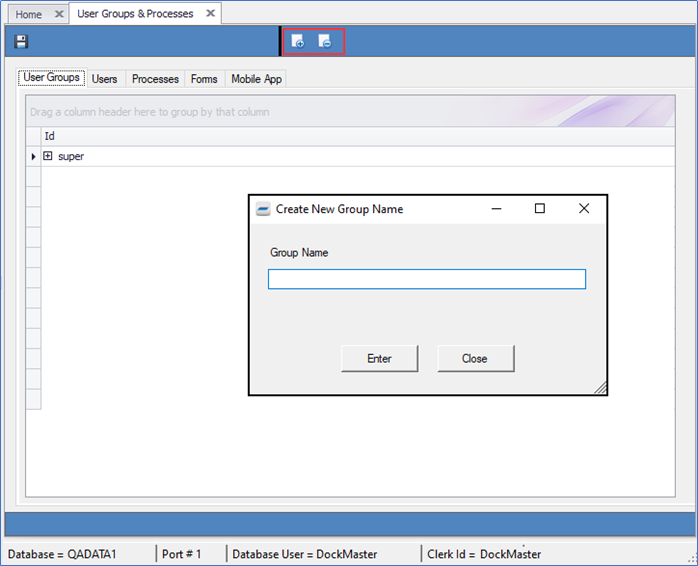
- Click the Add Group icon in the blue header above the tabs. There is no limit to the number of groups that can be added and they can be added at any time.
- Enter an appropriate Group Name and click Enter then click Close before moving to the next tab.
To Remove a Group
-
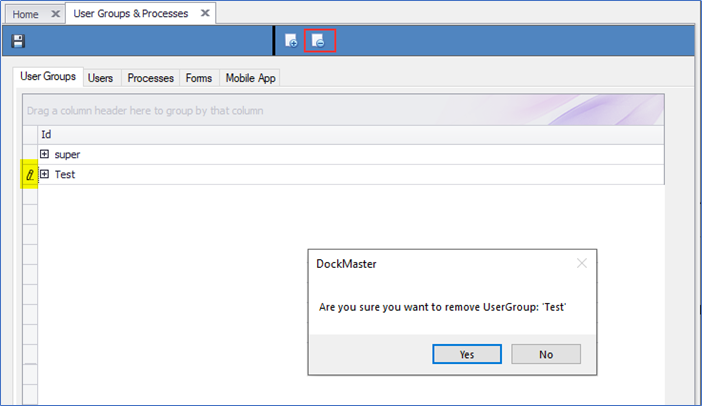
Click on the User Group to be removed. Make sure that a small pencil icon appears next to the group to be deleted.
-
Click the Remove group icon in the blue header above the tabs. Click Yes after verifying that the group selected is the correct one to be removed. Groups can be removed at any time but should not be removed if there are still clerks assigned to it, as their permissions will be affected, and they may not be able to access DockMaster.
Step 2: Users tab
This tab contains a list of all clerk or user records. It is here that each clerk will be assigned to one or more groups. Clerks can be updated at any time.
To add or maintain the User Group(s) that each clerk is assigned to, click the plus icon beside each user. In the Is Member column, add or remove the check for each User Group that the clerk is to have privileges. If checked, the user is a member of the group, if unchecked the user is not a member of the group.
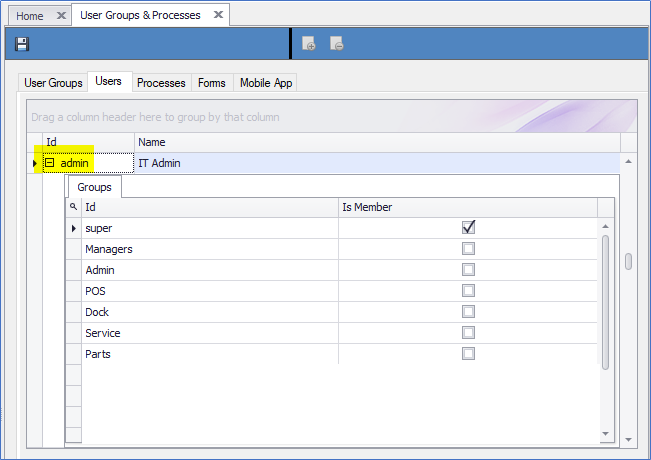
After each user (clerk) has been assigned to one or more groups, click the Save icon.
Step 3: Processes tab
This tab contains application processes that run in certain modules but do not show as a tab or button, etc. in the processing area, such as maintaining security and overriding rigging limits in service for inventory units. Access is assigned groups, not the individual user.
By default, user groups automatically have access to processes. To maintain a group's access to each process, simply add or remove the check for that group's row.
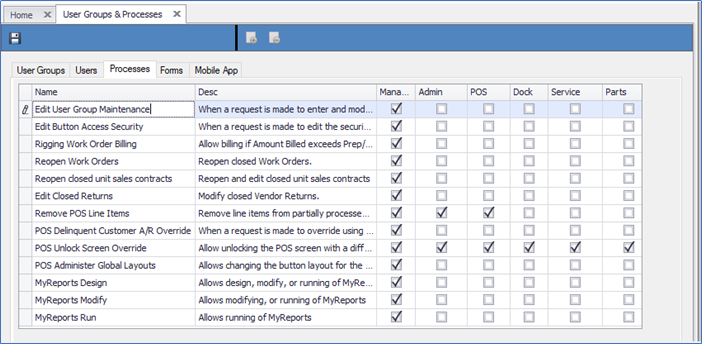
After each user (clerk) has been assigned to one or more groups, click the Save icon.
Step 4: Forms tab
The Forms tab controls the group level access to all areas in DockMaster for forms.
- To maintain the group's permissions for each area, add or remove the check for the area row for the group.
- To change permissions to child items for the area, click the record selector to the left of the area and then maintain the permission by adding or removing the check.
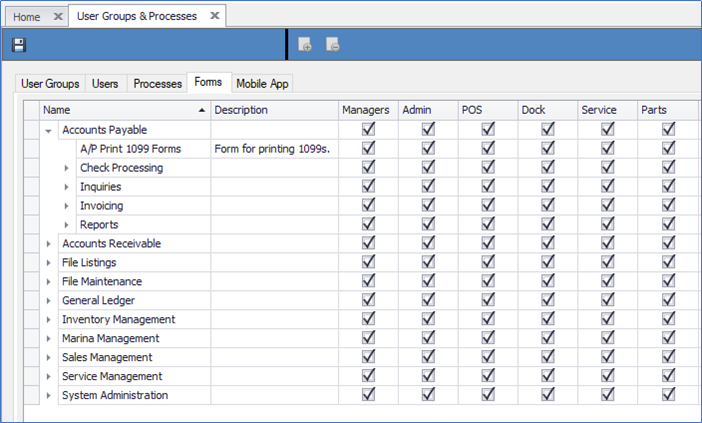
Note: Once security has been configured for Users, Groups, and Forms, additional permissions can be created and maintained for individual tabs, buttons, and fields by opening the form you wish to add additional security settings to and pressing Ctrl+F9. Super User level access is required to set form level controls.
Step 5: Mobile App tab
The Mobile App tab is used to input a purchased license key to be used with DockMaster’s Mobile app and is discussed in another document titled Installing and Managing the Mobile App License Key.
