Fuel Cloud Pump Setup in Point Of Sale
Already have Fuel Cloud setup in your Dockmaster system?
Need to add another POS workstation to use the Fuel Cloud integration with your Pumps?
The following guide is how to:
Set up Fuel Cloud Pump Setup in Point Of Sale
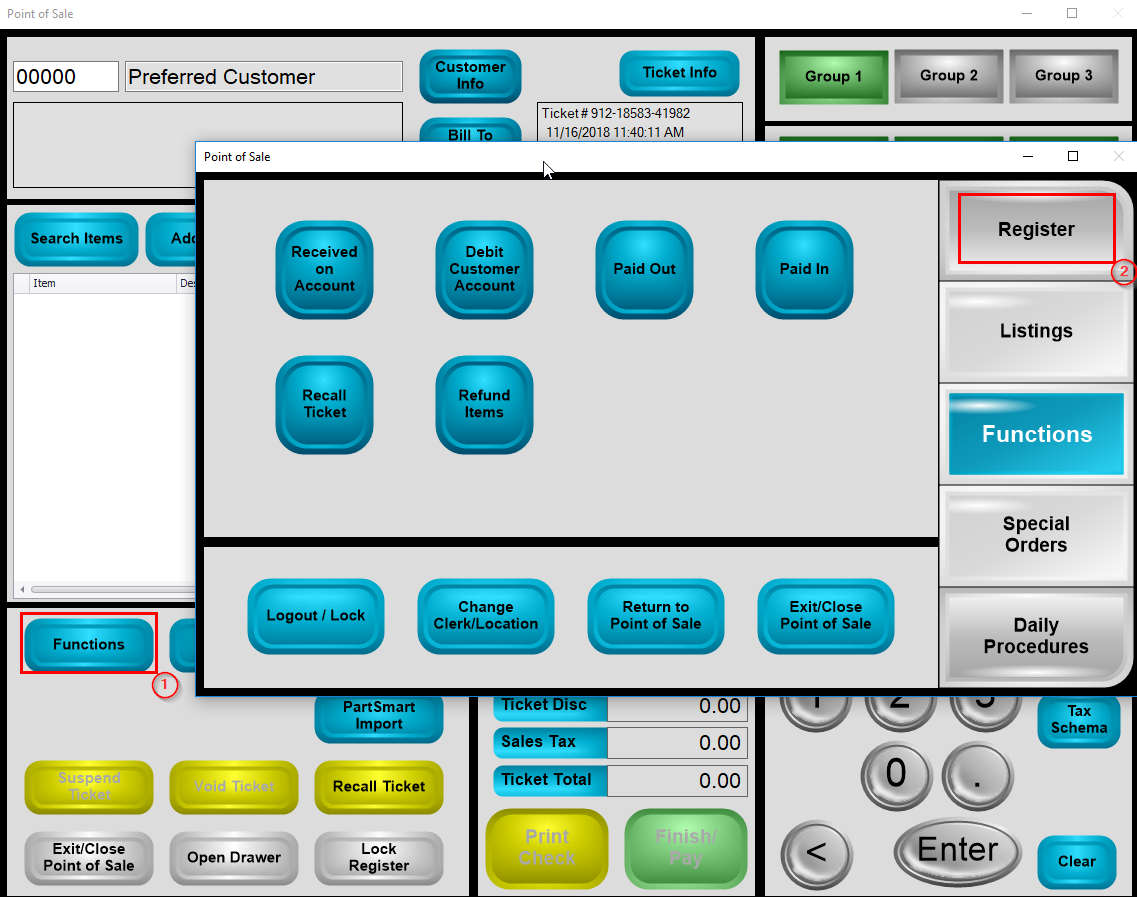
Open Point of Sale and click (1) Functions, then (2) Register.
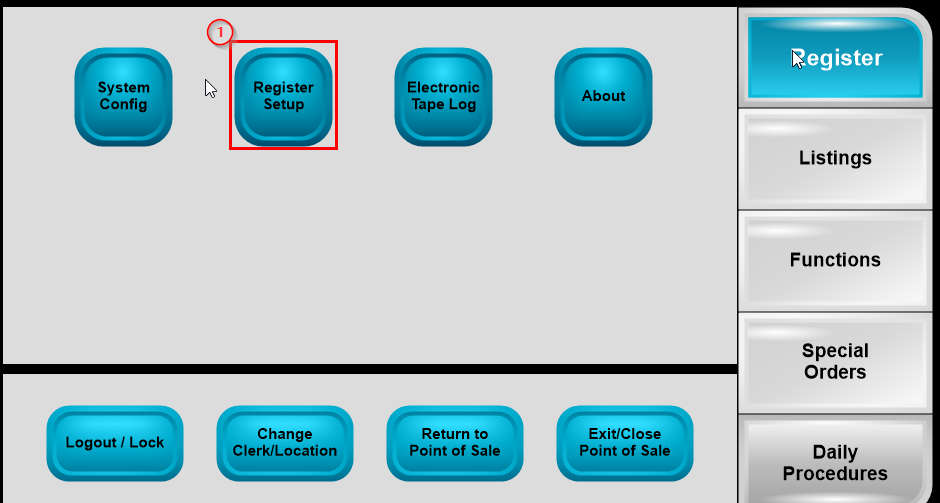
Click (2) Register Setup
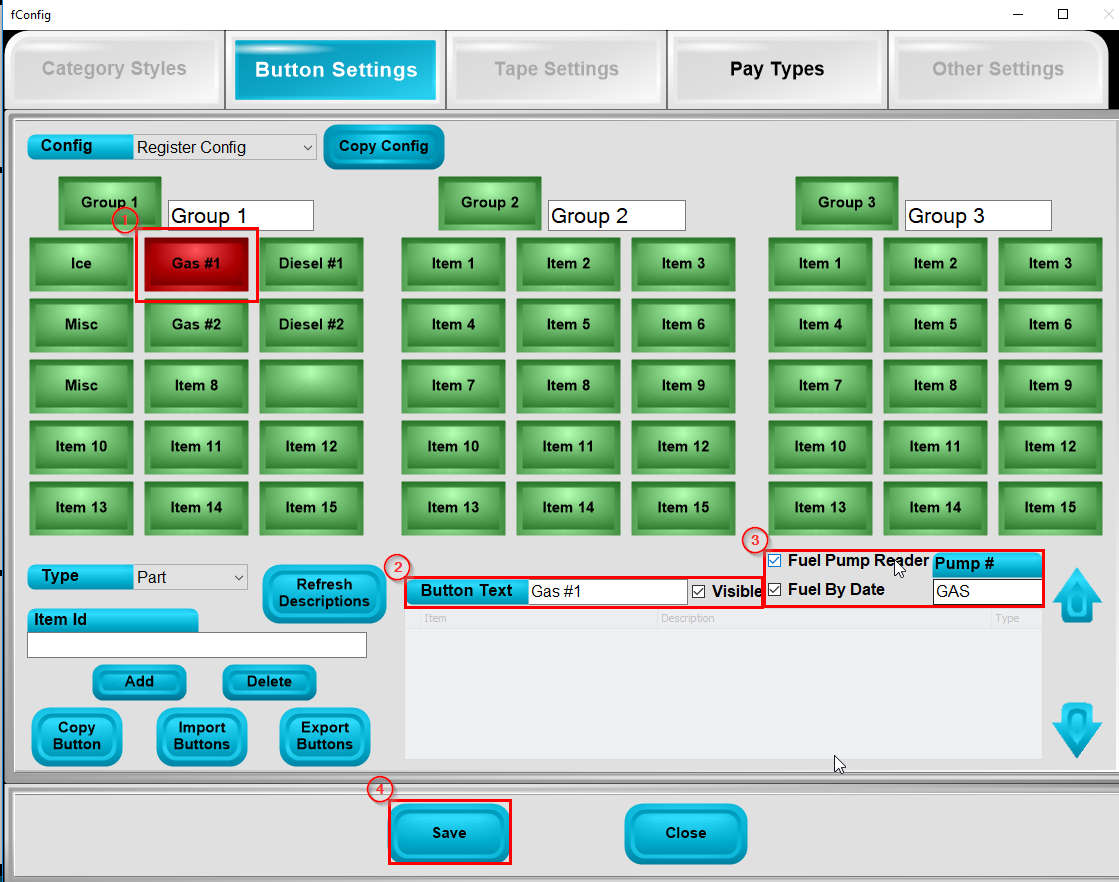
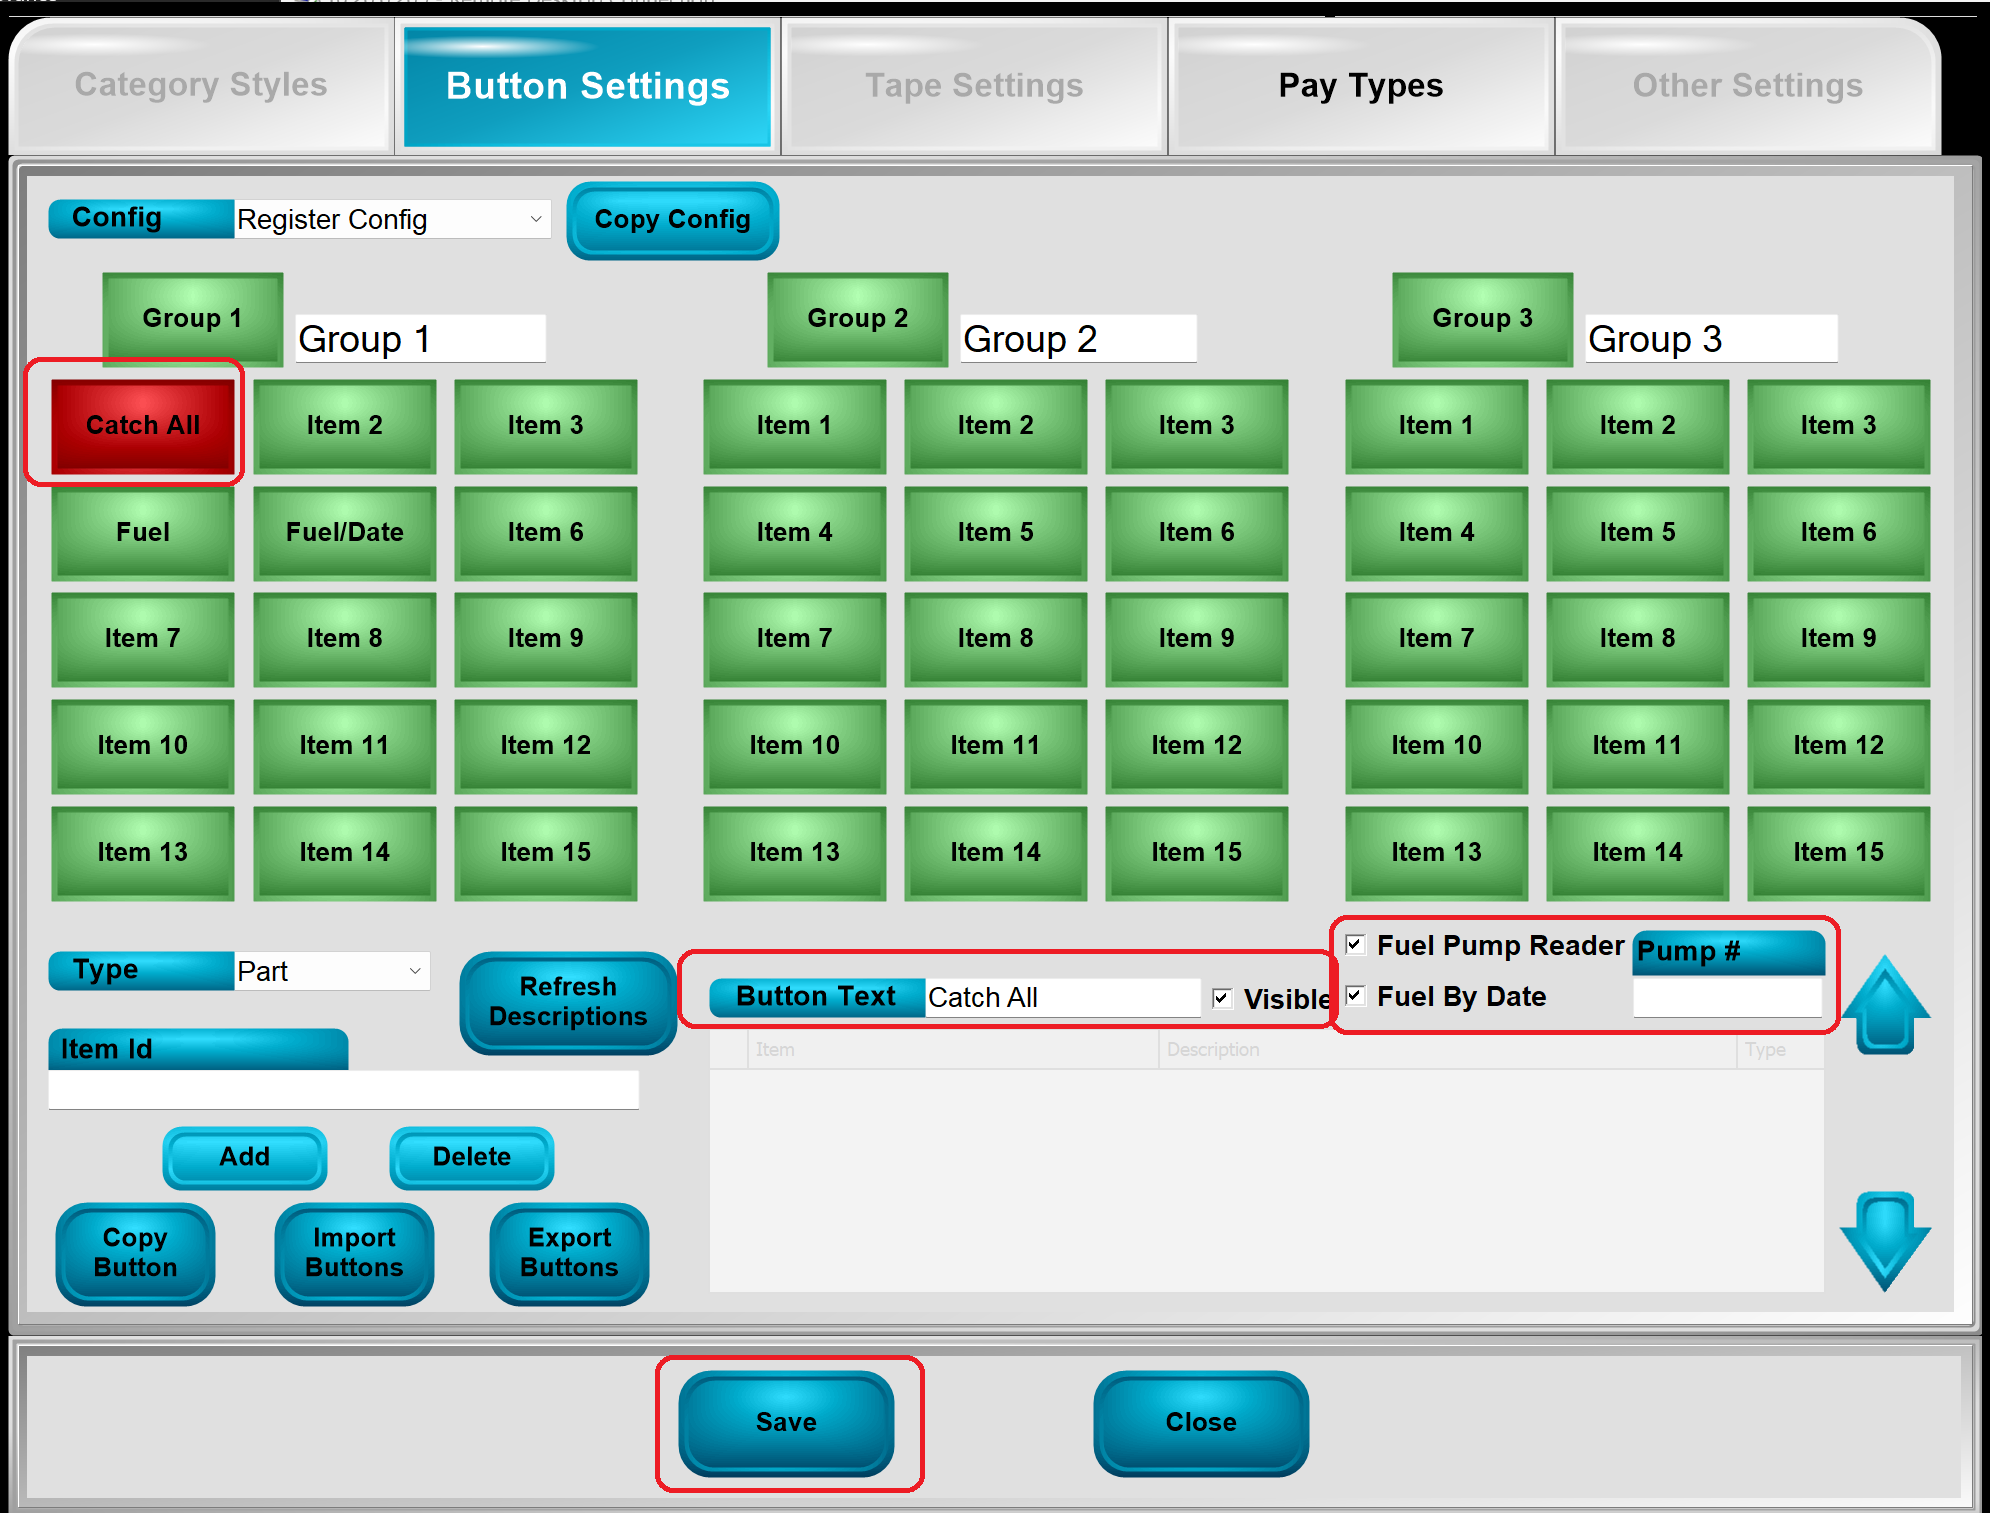
This is the screen where you will set up your Point of Sale register buttons for the fuel.
Select a button, then click on it, (1) to configure the fuel pump. Proceed to the next page.
In the Button Text field (2) key in the name to properly identify the type of fuel, then click the
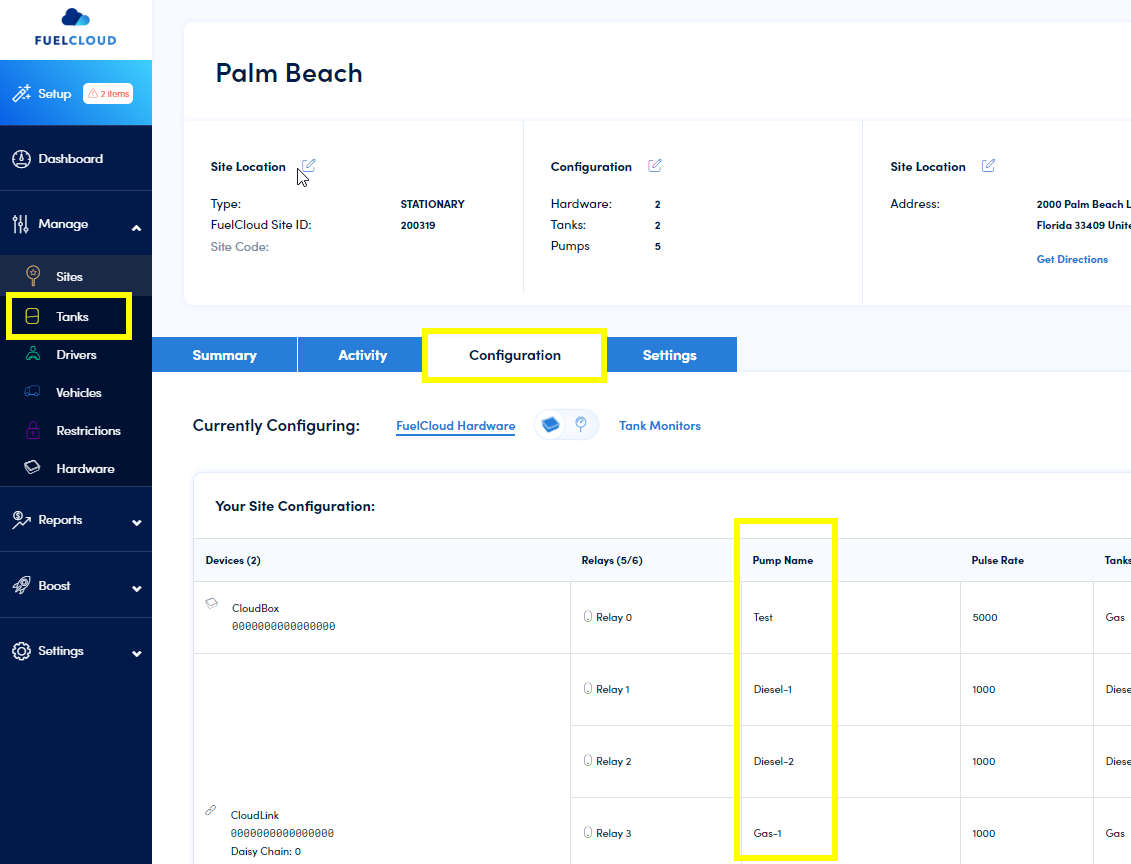
Visible box. Click (3) the Fuel Pump Reader box and, in the Pump# box, key in the name of the
pump as specified in the FuelCloud app on the (1) Tanks screen:
If you want to enable the clerk to choose fuel transactions by date, click the (3) Fuel by Date
box on the Register setup screen, as seen on the previous page.
If there is more than one fuel pump, begin this process again by choosing another button to
configure. After all pumps have been associated with a POS button, press Save, then close.
If you want a 1 Button to look at ALL fuel transactions from ALL pumps, just do the same button setup and DO NOT add a pump name in the Pump # field.
**If at any point you run into any issues, feel free to email [email protected] for assistance.**
