Inventory Management - TRANSFERS
Transfers
Inventory Management
Dockmaster allows for parts inventory transfers to multiple locations within the same database. When managing inventory in multiple locations within a single database, inventory transfers are used to track the movement of goods between those locations. Some examples of when to utilize inventory transfers:
- Stockroom Balancing
- Fulfilling Customer Orders
- Replenishment
- Seasonal Demands or Promotions
- Consolidation or Redistribution
- Location-specific Inventory Tracking
Inventory Transfers
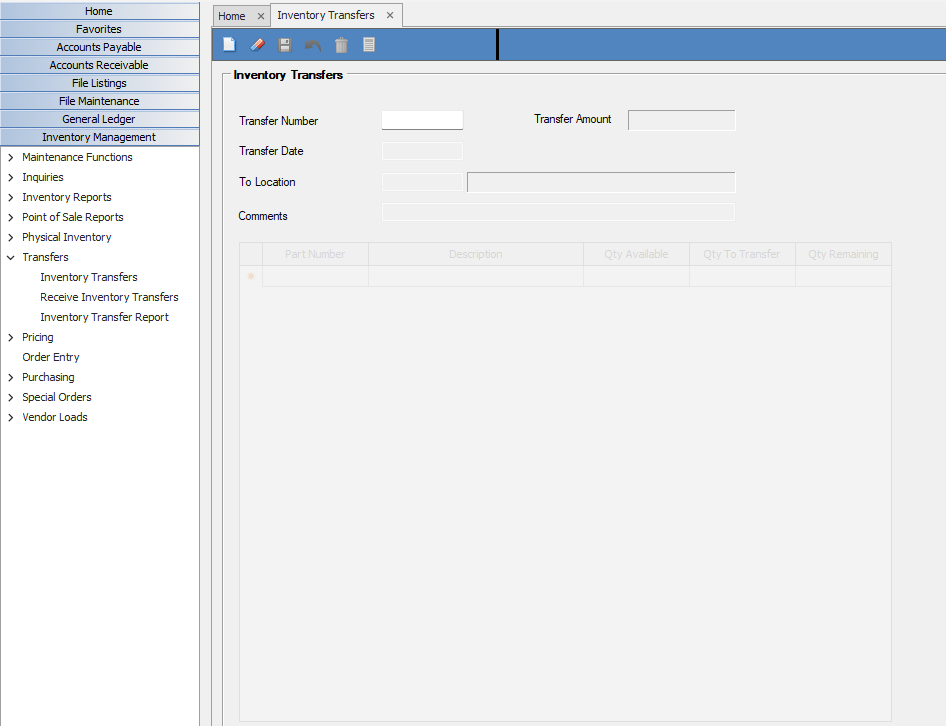
Inventory Management > Transfers > Inventory Transfers
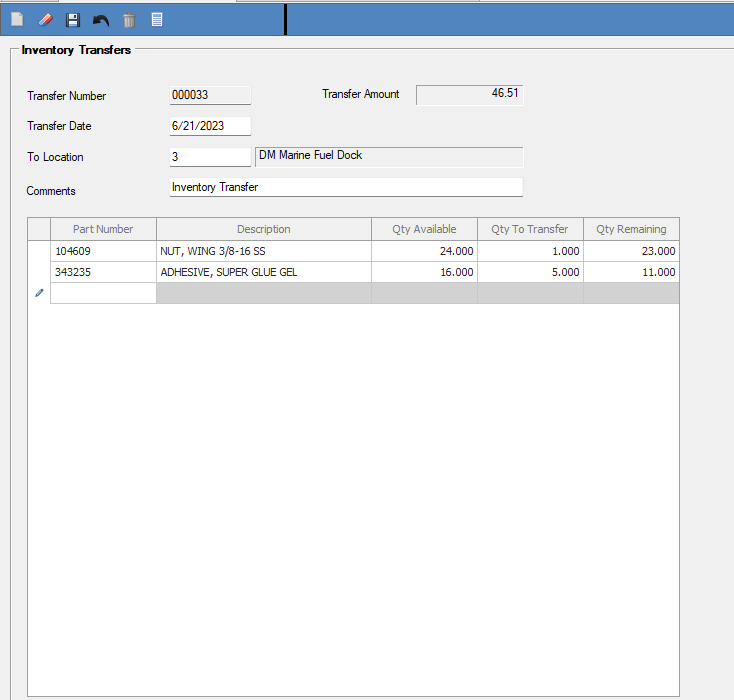
The multi-location grid will populate, and we need to select our “FROM” location. This is the location that has the inventory item that you want to transfer. Once selected, you will be able to generate a New Transfer Number. Type N and press enter in the transfer number field or select the New Icon.
- Transfer Date – This is the date the items physically moved from one location to another.
- To Location – This is the “TO” location that will receive the transferred item(s).
- Comments – Enter comments to document the transfer or press
Enterto use the default system description – Inventory Transfer. - Part Number – Enter or search “\” for the part number that will be transferred. The part description and QTY Available will appear; these fields cannot be maintained from this screen.
- QTY to Transfer – Enter the qty to transfer, must be a whole number.
- QTY Remaining – This is automatically calculated and cannot be maintained.
Once you have added the part(s) you want to transfer, you will notice a Transfer Amount with a value. This is the total cost of part(s) being transferred.
Before saving, it is best practice to review the G/L Distribution by selecting the icon that resembles a calculator in the top bar. This is read only.
Select the Save button to verify transfer.
Receiving Inventory Transfers
Inventory Management > Transfers > Receive Inventory Transfers
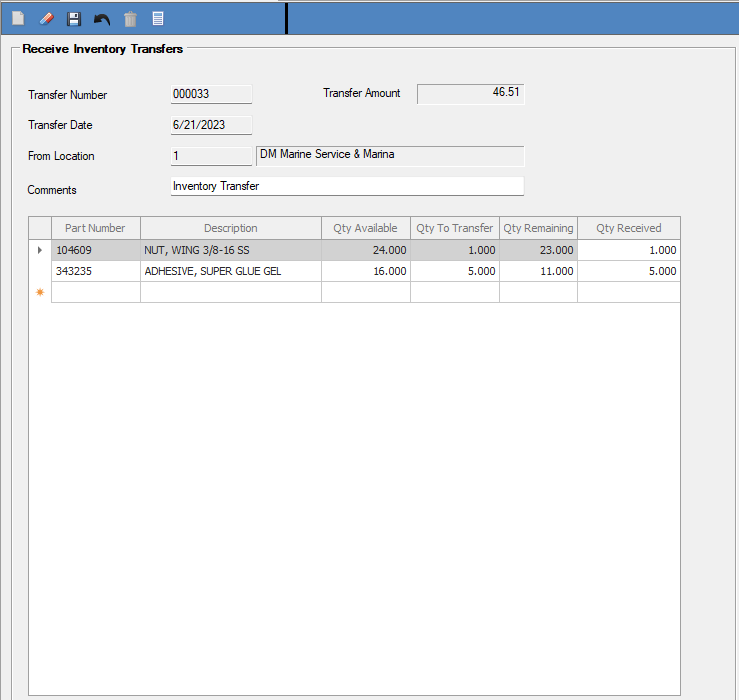
The second step in the Inventory Transfer process is the receipt from the second location that the items transferred have indeed been received and accounted for. The multi-location grid will pop-up and we will select the “To” or receiving location.
- Transfer Number – Enter the transfer number from the Sending location or righ-click List Open (F6) to select the transfer number from the Open list.
- Transfer Date – Date transfer was sent to this location, not maintainable from this location.
- From Location – Location that you are receiving the parts from.
- Comments – Can use the default Inventory Transfer or change for specific comments.
- Review the Parts and QTY to Transfer
- Verify QTY Received is accurate or adjust as needed.
- Review the G/L Distribution.
After you have verified the information and quantities are accurate, select Save. This will post and complete the transfer.
Inventory Transfer Report
Inventory Management > Transfers > Inventory Transfer Report
Once the transfer has been completed and posted, it is best practice to review/print the Inventory Transfer Report.
Note: Make sure to review the Specific Values tab and adjust filters as needed for the report. The report will default to a date range for Today. If you need a broader date range, make sure to adjust this.
If questions or issues please contact [email protected].


