Loading Vendor Price Books
LOADING VENDOR PRICE BOOKS
Purpose: The purpose of this tutorial is to explain how to load manufacturer and distributor price books into the Inventory File.
Due to the way some manufacturers and distributors send their price book files, they must be "converted" by DockMaster before being loaded into your system. Please submit a support ticket to [email protected] to advise us of the manufacturers and distributors you will be using; we can then determine if the files will need to be converted. There is a nominal fee charged to convert the files to be loaded to use this routine.
Step 1: Prerequisite Items
Before loading a Vendor price book into DockMaster, make sure to check the following items:
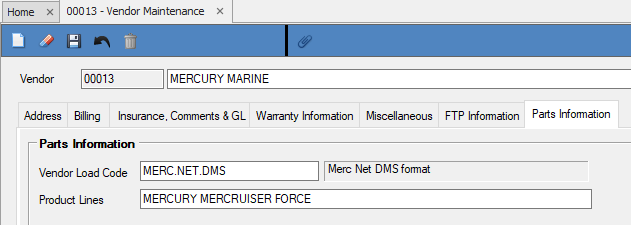
- Check the Vendor File to ensure that the correct Vendor Load Code is attached to the Vendor (this can be found on the Parts Information tab in the Vendor File). DockMaster has pre-defined load codes for most manufacturers and distributors.

- Create an Inventory Load Code if one does not already exist (see Load Code Maintenance in Inventory Management > Vendor Loads). DockMaster will create a Load Code for a fee.

-
Optional - If you want a manufacturer or distributor to have a separate department set up a
department through the Department File program. -
If you are not on the most current DockMaster release, submit a support ticket to
[email protected] for verification that your Vendor Load Code matches the most recent
version in DockMaster. -
It is recommended that everyone log off the system that could possibly be affecting/updating the
Inventory File, including anyone using any program in the Point of Sale, Service and Special Orders
modules.
Step 2: Set up the Inventory Parts Load form
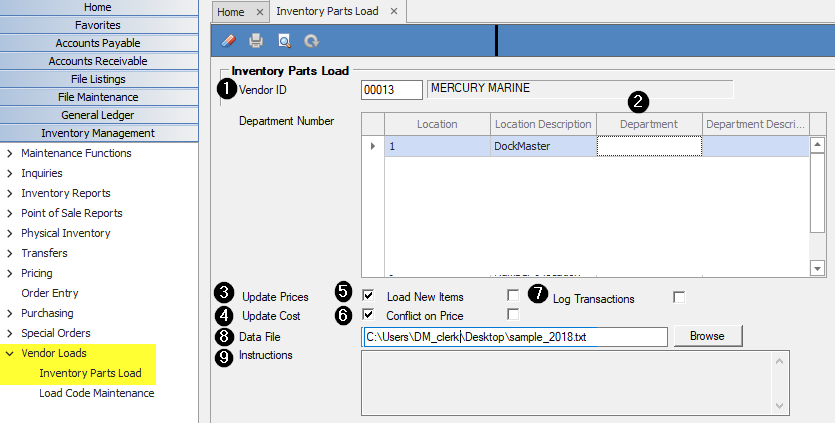
Go to Inventory Management > Vendor Loads > Inventory Parts Load:

-
Vendor ID: Enter the Vendor Number for the manufacturer or distributor you are loading; type a
backslash "" followed by the vendor's name to access a cross-reference list. Press F6 to list all
vendors with load codes attached. -
Department Number – Click in the Department column to enter a Department Number for each
location the price book will load or update. Press F6 to list the available departments. -
Update Prices – This option is checked by default. This option is used to update Selling Prices based on the Load Code parameters and price book file information.
-
Update Cost – This option is checked by default. This option is used to update the Vendor Cost based on the Load Code parameters and price book file information.
-
Load New Items - Click the Load New Items option to update the Inventory File with any new parts found in the price book file.
-
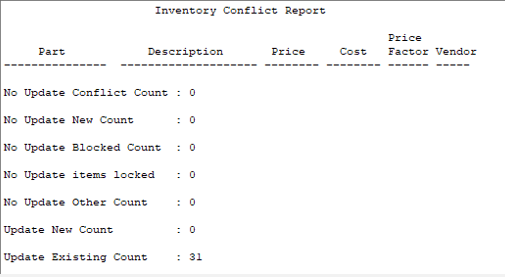
Conflict on Price Factors - Click the Conflict on Price Factors option to notify you if the Price Factor on the part is different from the discount code being loaded. During the load process, conflicts will be displayed and can be printed after the load has completed.
-
Log Transactions – By default, this prompt is turned off. If checked, the system tracks all updates to the File Transaction Log (FTL). Tracking all the updates in the load can undersize your log file and slow down the vendor load process. Note: Please contact DockMaster Support before turning this option on.
-
Data File - Enter the Data File Path of the price book file. The proper format is: C:\Directory\File Name where Directory is the Windows directory and File Name is the file being imported. Click the Browse button to select a path and file name.
-
Instructions - The Instruction area will display any instructions maintained in the Load Code used by the Vendor selected. You can copy and paste the instructions into Notepad to print them out. You cannot maintain this area.
Step 3: Process the Load
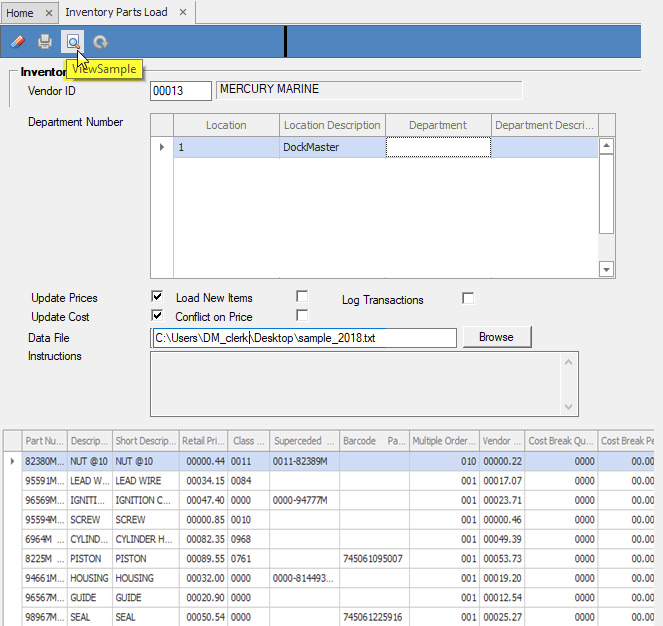
Click the View Sample icon to populate the grid with a sample of the price book file:

If the data in the grid looks correct, proceed to the next step.
- Click the Process button to process and load the price book file.
Once the Process button is pressed, the Inventory File will begin the update and the process cannot be stopped.
Record Length Error - If you get a record length error message, this indicates your Vendor Load Code is set up wrong.
After the upload completes, the top portion of the form will clear, and the bottom portion will display the results of the load:

Verify the results of the load by going to Inventory Management > Inquiries and reviewing a sampling of the parts from the upload.
**If at any point you run into any issues, feel free to email [email protected] for assistance.**