Introduction to Designer Layouts
Purpose: This document will introduce the DockMaster user to Designer Layouts.
Utilizing a third-party program embedded into the DockMaster software, we have created a set of PDF print layouts for Service Estimates, Invoices, and Work Requests. These layouts, also termed Banded Reports, provide a generalized report template.
Our objective in designing the layouts was to offer users a way to modify the service printing documents to suit their individual needs. Using any of the new layouts as a starting point, changing fonts, adding logos, adding data, relocating fields, adding color and watermarks, among other items, can be done with limited technical knowledge.
While you already have default layouts, chosen from a long list of pre-defined, unmodifiable templates, defined in Service Management Parameters - Printing to print estimates, work requests and invoices, the new layouts are an enhancement that broaden your options.
This list displays the names of the new Service Layouts available for modification:
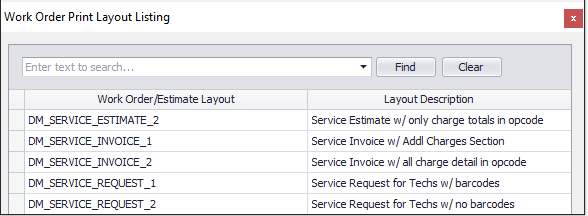
To view how these differ from the layout you are currently using, select one of the new layouts from the Service Printing screen. From there, decisions can be made as to what changes should be made to the report. This document will explain how to get started making the changes.
Step 1: Previewing the Designer Layouts
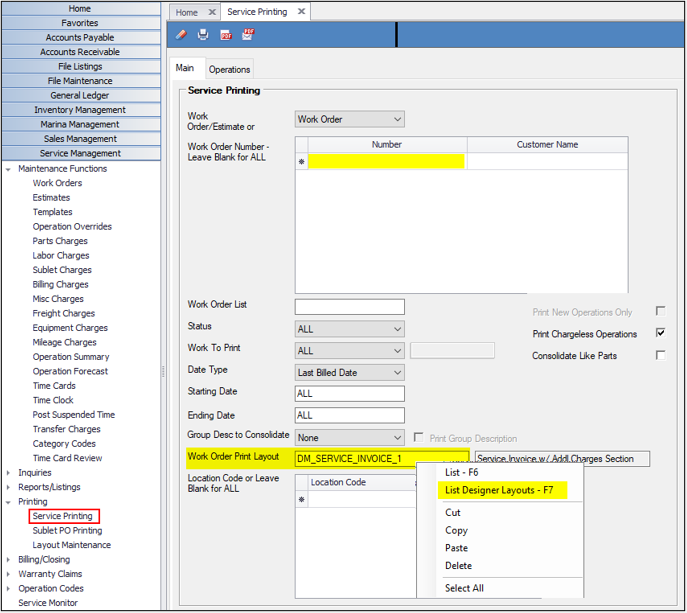
Go to Service Management > Printing > Service Printing.
- Work Order Number: Press F6 for a list or enter a work order number to view.
- Work Order Print Layout: Press F7 or Right-Click and choose List Designer Layouts.
- Select one of the new layouts.
- Click the one of the printer icons to generate and preview the report.
- Preview each of the new layouts to determine if one will serve your company better than the layout currently being used.
Step 2: Opening and copying a new layout to make changes
If you have made the decision to use one of the new layouts but want to add your logo or make other changes, you can create a copy of the original Designer layout, then modify it to suit your needs. This process begins with opening the original Designer layout and making a copy of it, as the originals cannot be modified.
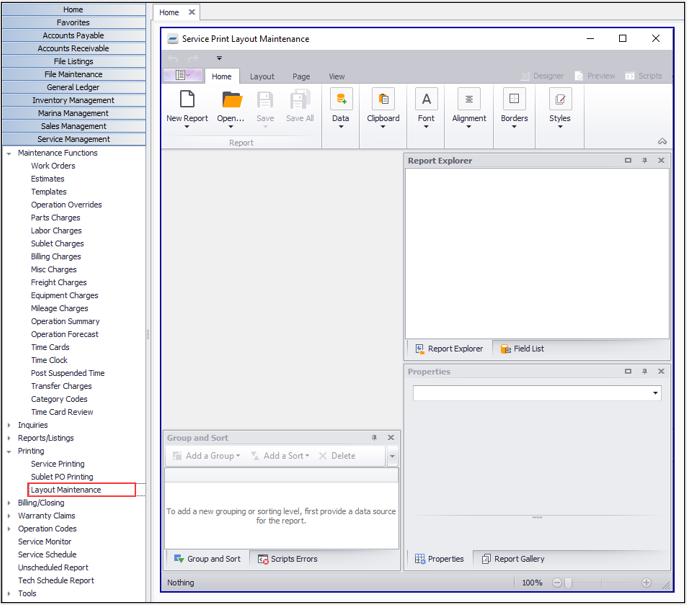
From the Menu, click Service Management > Printing > Layout Maintenance.
- The program will open on the Home ribbon. Click the orange folder icon to open a grid containing the list of all the new Designer Layouts, as shown on page 1.
Step 2: Opening and copying a new layout to make changes, cont’d
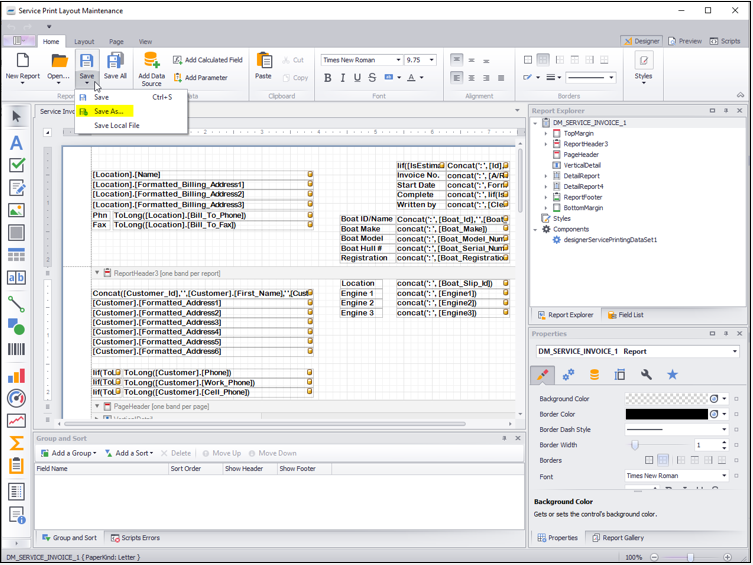
- Select the Layout that you want to modify.
- The workspace will be populated with the report bands of the selected report. The report bands include Report Header, Page Header, Detail Sections and Footers. The bands contain DockMaster data fields that can be formatted for individual needs.
- Since this is the original Designer Layout, a copy needs to be made so that changes can be applied. Click the arrow on the Save Icon and select Save As.
Step 2: Opening and copying a new layout to made changes, cont’d
- A message box will display where a new Layout Name will need to be entered:
The new name must begin with something other than DM. An attempt to save without changing the DM prefix results in this message:
A generally accepted practice is to create a prefix using an abbreviation or acronym of your company name for custom reports and layouts.
Type in a new Layout Name and click Ok.
You have now created a copy of a Designer Layout that can be modified and will be displayed in the grid list with the originals.
Step 3: Setting the default layouts in Service Parameters
It may be beneficial to set your new layout as a default so that when you open Service Printing, the layout will auto-populate with the desired selection.
This can be achieved by going to System Administration > Configuration > Service Management > Printing Tab.
This is where default service layouts are set:
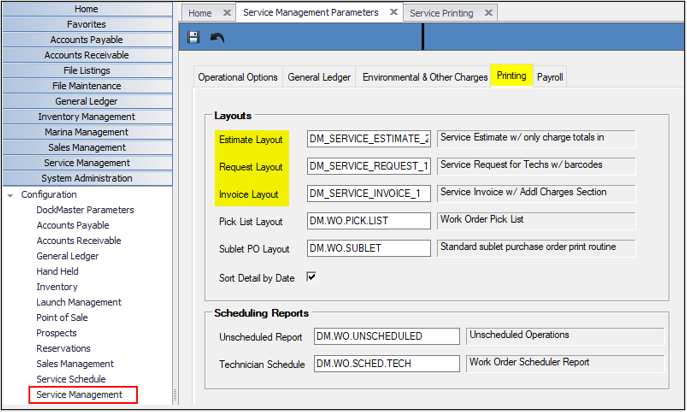
In each layout field that you want to assign one of the designer layouts, press F7 to list all available PDF designer layouts. Select the appropriate one, then save. Exit out of DockMaster and log back in for the changes to take effect.